Okay, so we're trying to eat healthier-- what some groups of people call "whole food" eating and others call "clean" eating. Basically, to me, this means I am trying to feed the family minimally processed foods-- things that are as close to the form they exist in nature as possible. Fresh peaches instead of canned. Whole grains instead of white flour. Avoiding premade store bought foods that typically have "high fructose corn syrup" or "partially hydrogenated soybean oil" as ingredients or anything else that's more likely to come from a chemistry lab than a typical pantry. And, that means we are eating lots more fruits & veggies.
I have come to realize that besides just eliminating extra ingredients, I also have to start considering if the produce I buy at the supermarket is safe for my family. In an ideal world, we'd just grow our own food. But unless you live on a farm or in a fairly rural area, that just isn't happening. I know that the next best thing is to buy local, organic produce. Unfortunately, the primary crops in this area are oranges and strawberries. Not exactly a balanced diet.
The next problem is that it costs waaaaaaaaaaaay more to buy organic produce at the grocery store than conventionally grown produce. So, what's a person (on a budget & wants to eat healthy) supposed to do? The answer: Prioritize!!
An environmental group (EWG) has compiled pesticide testing data from commonly consumed crops (each sample was washed & peeled as a consumer typically would) and ranked the results. The 12 worst offenders are referred to as the "dirty dozen" and are the foods you definitely should buy organic. On the other side, the "clean fifteen" are the foods with little to no contamination that you can continue to eat conventionally grown without concern. By knowing which foods to spend the extra money on AND which it isn't necessary, you can save money while getting the best nutrition for your family!!
As an interesting (and slightly scary) sidenote, this year's testing also included jarred baby foods. Varieties from the dirty dozen still showed notable pesticide & chemical contamination while the varieties from the clean fifteen showed no residues. I would hypothesize that these results can be carried over to frozen and canned varieties as well, letting you know which canned/preserved items should probably be purchased organic as well.
Download a cute reference card here from the ewg website. This list was updated for 2012 by ewg within the last week or so.
The 2012 Dirty Dozen
Apples
Bell Peppers
Blueberries
Celery
Cucumbers
Grapes
Lettuce
Nectarines
Peaches
Potatoes
Spinach
Strawberries
+ Green beans & Kale/Greens (which technically don't have the most but do have the worst kind of pesticides)
The 2012 Clean fifteen
Asparagus
Avocado
Cabbage
Cantaloupe
Corn
Eggplant
Grapefruit
Kiwi
Mangoes
Mushrooms
Onions
Pineapples
Sweet Peas
Sweet Potatoes
Watermelon
road

Sunday, July 1, 2012

Friday, June 29, 2012
Homemade Fruit & Grain Bars
Fruit & grain bars have somehow become a staple in our kitchen in the last few years. The 5 year old is ADDICTED. This happened when he was 2 and the bars had been a diaper bag grab & go, occasional food. But with rampant morning sickness & fatigue, I wasn't up to making him something most mornings and he didn't eat cereal. What was a sometimes food became his default breakfast and is one of his favorites still.
As I've been re-evaluating our food choices, especially things that come in boxes, I searched high and low for a premade variety of these that would meet my standards (I'm looking for pronouncible ingredients that I can find in my pantry w/o additives or preservatives). Grocery store? NO! Trader Joe's? No. Whole Foods??? Nope. So this became a top priority for me to figure out how to make it at home with out all the unnecessary stuff. Unfortunately, after several recipe searches, I came up dry. Lots of press & form, cut bars but nothing that looked or had the texture of a "real" fruit/grain bar.
I decided that I would try to make my own recipe- not really something that I've ever done. Typically, I just customize other people's recipes. This time I really had to start from scratch. For my approach, I looked a lot at what went into making homemade fig newtons because they seemed the most similar in structure. Of course we can't have fig newtons for breakfast (at least not every day...) so I had to figure out how to make it healthy enough to be a reasonable meal or snack. After around 3 months of test batches and adjustments, I think I've gotten it!
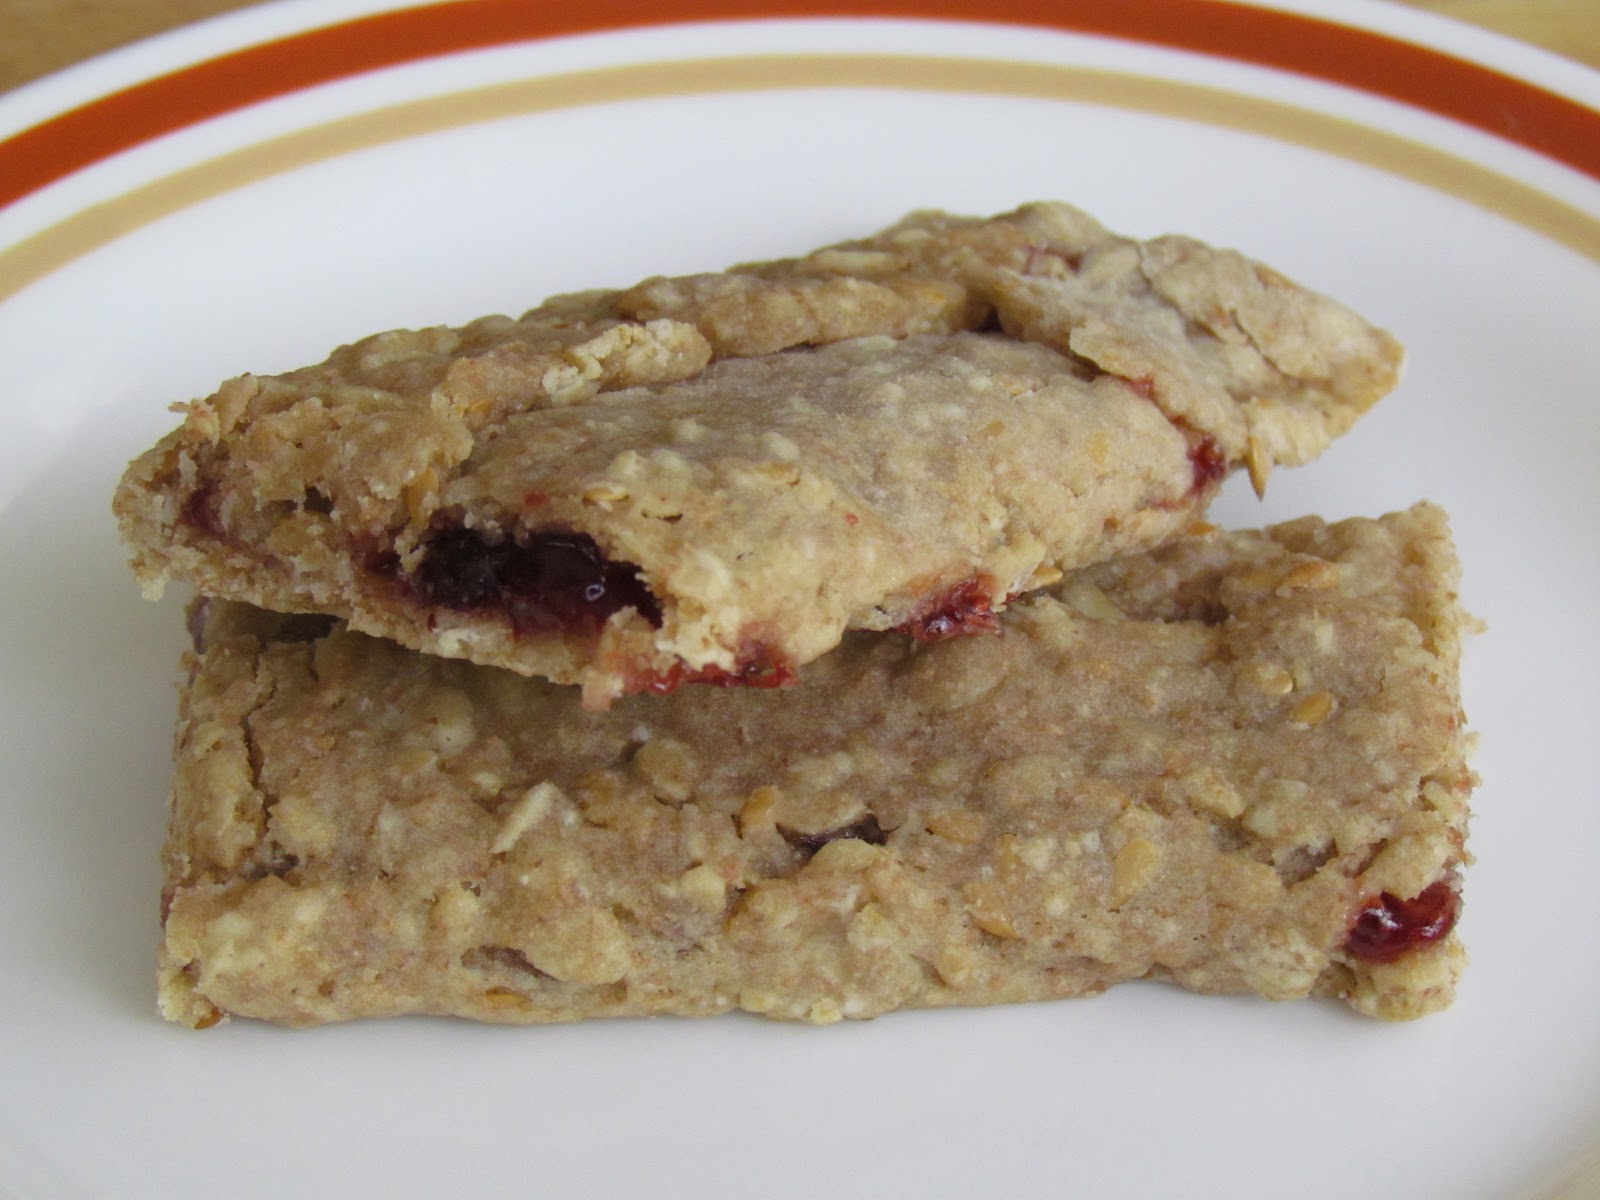
I'm really pleased at the nutrition of these bars-- they've got whole wheat, whole oats and flax seeds, so they provide a nice amount of fiber, whole grains and omega-3's. Using a rough online calorie calculator it shows about 200 calories per bar.
Even better than the nutrition is the taste and texture. They have the soft yielding crust of a prepackaged bar with a little extra crunch from the flax seeds & oats. By using almond extract, instead of vanilla, it adds just a little bit of that baked goods type flavor. We've tried this with mixed berry jams, strawberry, blackberry and raspberry so far, and they've all been excellent! Its nice to finally have something that not only smells good but tastes pretty darn good, too!
Cost wise, if you use a "select" jam (the kind I like has only fruit, sugar & pectin) it comes out pretty similar to buying them from the store. However, if you really want to make this a cheap project, use your own homemade jam!

1/3 cup softened butter
1 egg
1/2 tsp almond extract
1/2 cup whole wheat flour
1/2 cup all purpose flour
3/4 cup rolled oats (old fashioned or quick cook)
1/4 cup flax seeds
6-8 oz fruit jam (look for ones without corn syrup)
1) In a large mixing bowl, cream butter and sugar.
2) Add in egg & extract and beat for 1 minute.
3) In a separate bowl mix remaining dry ingredients.
4) Slowly add dry ingredients to wet, beat until well mixed. Dough will be very sticky!
5) Refrigerate covered dough for 1 hour (you can leave in fridge overnight, just leave out on counter 10-15 minutes to soften up)
6) Divide dough into 2 equal portions.
7) Roll one dough portion out on floured surface to 1/8" thick (think pie crust or thinner). You should have a rough rectangle 10 x 12" long.

8) Cut rectange in half (lengthwise) and transfer 1 portion of dough to cookie sheet covered with silicone mat or parchment paper. Fix any rips or holes in dough. Reshape as necessary.


9) Spoon 1-1 1/2 Tbs jam down center of dough strip.

10) Fold 1/3 of dough over jam, fold opposite 1/3 of dough over other fold. Pinch seam to seal. Pinch ends to seal. Finished bar should be 1- 1 1/2" wide and approx 12" long. Narrower is better. Make sure bars have the final appearance you desire. Repair any jam leaks!


11) Complete steps 8-10 for other half of rolled dough and repeat steps 7-10 for other unrolled dough portion. You should have 4 bars approximately 1 1/2" x 12" on your baking sheet.

12) Bake @ 350 F for 10 minutes. These do not brown much. If you overcook, the jam will melt out!
13) Let cool completely on cookie sheet.
14) Cut each long bar into 3 equal bars approximately 4" long.
15) Store bars in airtight container in refrigerator for up to 2 weeks. (We actually had the last batch for a little over 2 weeks and I ate the 2nd to the last one- while ever so slightly crumbier than a super fresh one, it seemed none the worse for wear!)

If you give this recipe a try, comment below and let me know how it worked for you!
As I've been re-evaluating our food choices, especially things that come in boxes, I searched high and low for a premade variety of these that would meet my standards (I'm looking for pronouncible ingredients that I can find in my pantry w/o additives or preservatives). Grocery store? NO! Trader Joe's? No. Whole Foods??? Nope. So this became a top priority for me to figure out how to make it at home with out all the unnecessary stuff. Unfortunately, after several recipe searches, I came up dry. Lots of press & form, cut bars but nothing that looked or had the texture of a "real" fruit/grain bar.
I decided that I would try to make my own recipe- not really something that I've ever done. Typically, I just customize other people's recipes. This time I really had to start from scratch. For my approach, I looked a lot at what went into making homemade fig newtons because they seemed the most similar in structure. Of course we can't have fig newtons for breakfast (at least not every day...) so I had to figure out how to make it healthy enough to be a reasonable meal or snack. After around 3 months of test batches and adjustments, I think I've gotten it!
I'm really pleased at the nutrition of these bars-- they've got whole wheat, whole oats and flax seeds, so they provide a nice amount of fiber, whole grains and omega-3's. Using a rough online calorie calculator it shows about 200 calories per bar.
Even better than the nutrition is the taste and texture. They have the soft yielding crust of a prepackaged bar with a little extra crunch from the flax seeds & oats. By using almond extract, instead of vanilla, it adds just a little bit of that baked goods type flavor. We've tried this with mixed berry jams, strawberry, blackberry and raspberry so far, and they've all been excellent! Its nice to finally have something that not only smells good but tastes pretty darn good, too!
Cost wise, if you use a "select" jam (the kind I like has only fruit, sugar & pectin) it comes out pretty similar to buying them from the store. However, if you really want to make this a cheap project, use your own homemade jam!
Recipe: Fruit & Grain Bars (12 bars)
1/2 cup brown sugar1/3 cup softened butter
1 egg
1/2 tsp almond extract
1/2 cup whole wheat flour
1/2 cup all purpose flour
3/4 cup rolled oats (old fashioned or quick cook)
1/4 cup flax seeds
6-8 oz fruit jam (look for ones without corn syrup)
1) In a large mixing bowl, cream butter and sugar.
2) Add in egg & extract and beat for 1 minute.
3) In a separate bowl mix remaining dry ingredients.
4) Slowly add dry ingredients to wet, beat until well mixed. Dough will be very sticky!
5) Refrigerate covered dough for 1 hour (you can leave in fridge overnight, just leave out on counter 10-15 minutes to soften up)
6) Divide dough into 2 equal portions.
7) Roll one dough portion out on floured surface to 1/8" thick (think pie crust or thinner). You should have a rough rectangle 10 x 12" long.


9) Spoon 1-1 1/2 Tbs jam down center of dough strip.

10) Fold 1/3 of dough over jam, fold opposite 1/3 of dough over other fold. Pinch seam to seal. Pinch ends to seal. Finished bar should be 1- 1 1/2" wide and approx 12" long. Narrower is better. Make sure bars have the final appearance you desire. Repair any jam leaks!

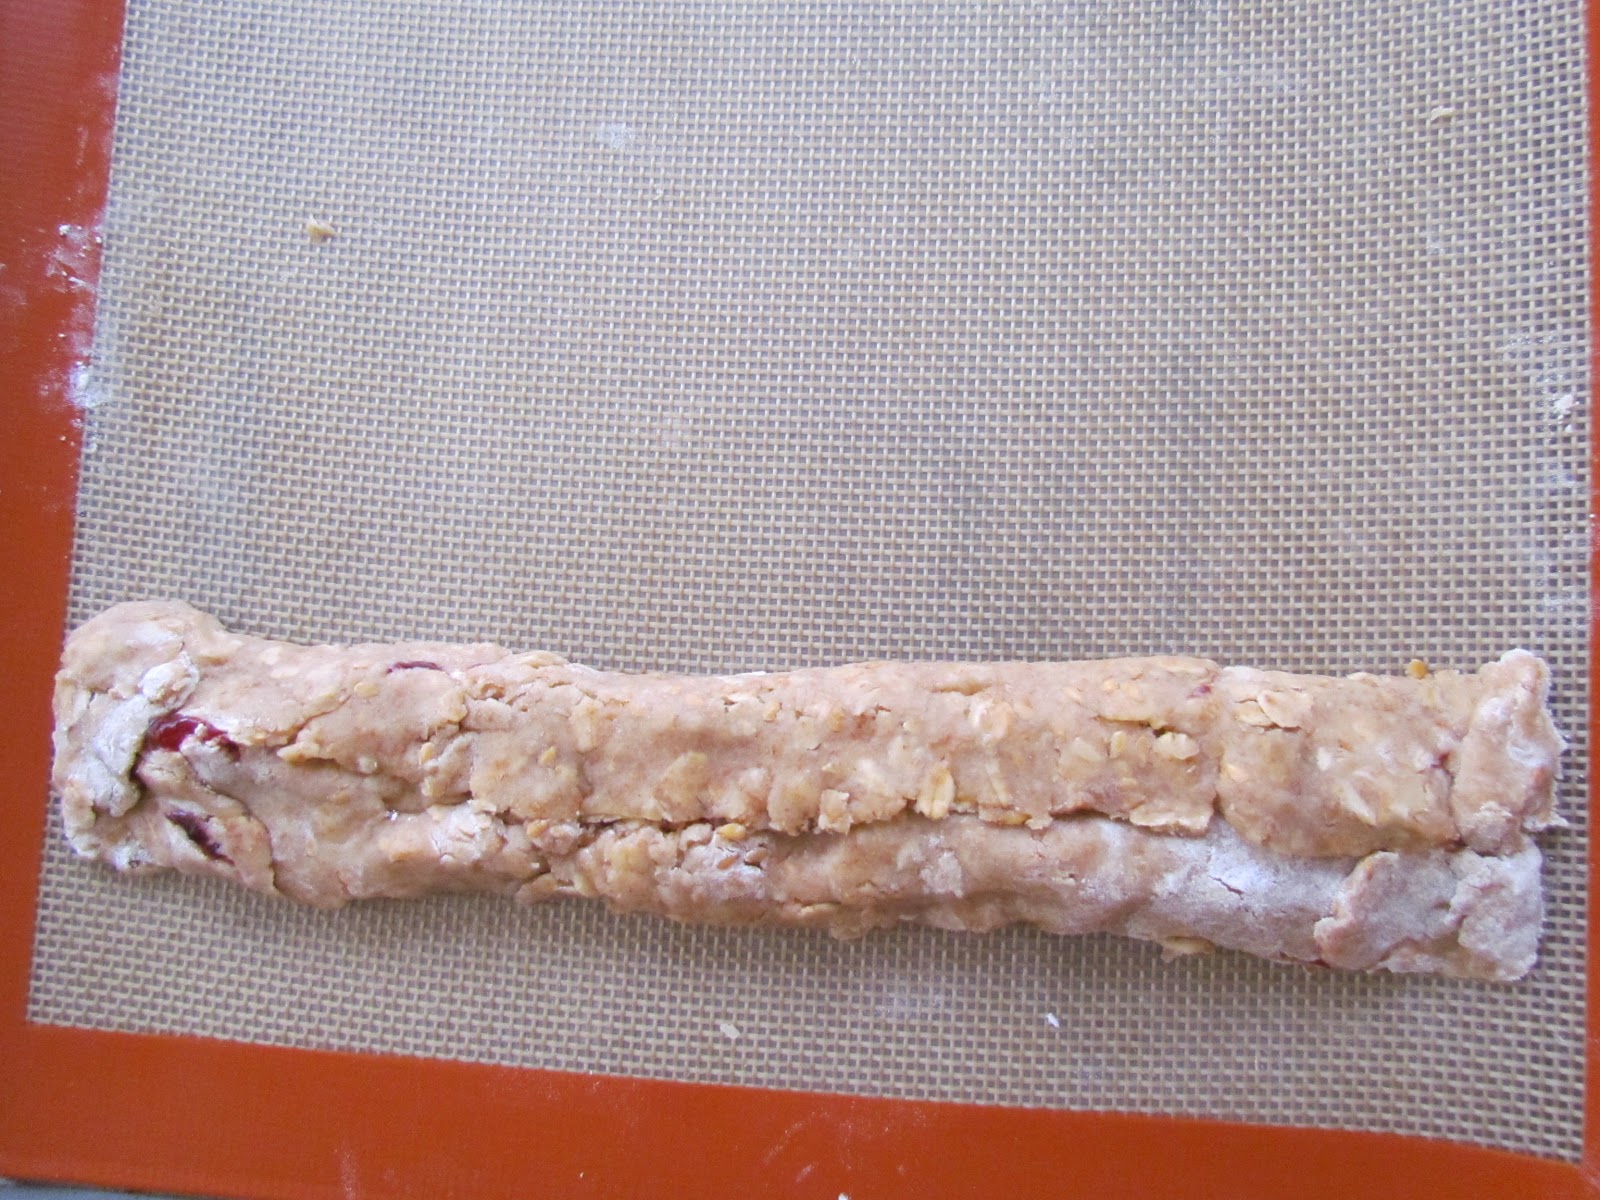
11) Complete steps 8-10 for other half of rolled dough and repeat steps 7-10 for other unrolled dough portion. You should have 4 bars approximately 1 1/2" x 12" on your baking sheet.

12) Bake @ 350 F for 10 minutes. These do not brown much. If you overcook, the jam will melt out!
13) Let cool completely on cookie sheet.
14) Cut each long bar into 3 equal bars approximately 4" long.
15) Store bars in airtight container in refrigerator for up to 2 weeks. (We actually had the last batch for a little over 2 weeks and I ate the 2nd to the last one- while ever so slightly crumbier than a super fresh one, it seemed none the worse for wear!)

If you give this recipe a try, comment below and let me know how it worked for you!
Wednesday, June 27, 2012
Taco-sagna!!!
Okay, I totally made that up! I got the idea for this dish from a recipe for vegetarian enchiladas from a Sunset magazine years ago. The original recipe called for making individual mini-casseroles but that was TOO much work!! I made a few adjustments to the recipe, including making it as one big casserole. The assembly process for this dish reminded me of making a lasagna but with Mexican themed ingredients-- and TACO-SAGNA was born!
This dish is really versatile-- it can be made primarily with pantry items (canned beans, sauce, etc) for an easy midweek dinner, it is completely vegetarian (if you make sure your refried beans are vegetarian) OR you can make everything fresh and have a great whole-foods dinner filled with healthy & nutritious veggies, legumes & whole grains (masa used to make corn tortillas is considered whole grain- did ya know?)
If you're looking for a dish to try out "meatless mondays" or take to a potluck that has vegetarians in attendance, this is a perfect dish-- I guarantee you won't miss the meat at all!
Taco-sagna

Ingredients:
12 corn tortillas
1 15 oz can tomato sauce (or 2 cups homemade)
1 packet taco seasoning mix (or 2 Tbs homemade-I like this recipe)
1 16 oz can refried beans (or 2 cups homemade) I like the lowfat refried black beans
1 16 oz can pinto or black beans (or 2 cups homemade)
1 16 oz can corn kernels (or 2 cups frozen)
10-16 oz fresh steamed/wilted baby spinach leaves (drained, squeezed & chopped-- can sub frozen)
1-2 cups shredded cheese (Cheddar, monterrey jack work well)
Optional:
1 2.25 oz can sliced black olives
Sour cream
Chives
Directions:
1) Pour tomato sauce into small bowl, mix in taco seasoning, set aside.

2) Cut tortillas in half.

3) Place 8 tortilla halves over bottom of 9x13 baking dish/casserole. Placement isn't particularly important, just try to mostly cover the bottom of the dish.

4) Spoon 1/3 of sauce over tortillas.

5) Spread refried beans over tortilla layer.

6) Add pinto beans.

7) Place 8 tortilla halves over bean filling layer. Again, try to basically cover the bottom.

8) Spoon next 1/3 of sauce over tortillas.

9) Evenly spread corn kernels over tortilla layer.

10) Using your fingers pinch apart spinach into small evenly distributed clumps.

11) Place last 8 tortilla halves over spinach/corn layer.

12) Spoon last 1/3 of sauce over tortillas.

13) Sprinkle 1-2 cups of shredded cheese over the top

14) Top with sliced olives (if desired)

15) COVER with aluminum foil and bake at 375 for 20 minutes. Remove foil and bake for an additional 10 minutes.
16) Casserole is done when cheese is melted and edges are bubbly. Makes approx. 8 servings.
Serving suggestion: Top taco-sagna squares with a dollop of sour cream and some chopped chives.
Final Note: As well as being able to freeze this entire casserole uncooked, the cooked leftovers will also freeze & reheat beautifully!! This week is a bit of a freezer refill week. Yesterday, I made a big batch of freezer burritos for hubby and myself and today I made one taco-sagna for dinner and one for the freezer. I'm trying to take my own advice from Sunday's tip!!
Subscribe to:
Posts (Atom)