road

road
Showing posts with label Veggie Variety. Show all posts

Thursday, January 31, 2013

A Tale of Two Veggies.....

Last year, one of my goals in improving our eating was to include more fruits and veggies.  One way I was interested in doing that was by joining a CSA.
  • Those of you who aren't familiar with them, a CSA is community sponsored agriculture--a farm shares type of investment in a local farm. You might pay a set amount for a whole season (and get proportional shares of the crops) or you might pay a subscription amount per week or box of fruits/veggies you get.
Unfortunately, I found that out here, there isn't much active farm left (except for orange groves). But, luckily there are a lot of farm communities nearby (say w/in 50-100 miles). I found a co-op that several farms contribute to and then you purchase a box (paying by the size & frequency). Its all organic and....... it comes delivered to the DOOR! How awesome is that?

We signed up last June and I decided to start small-- a less frequent delivery but a bigger box. I figured that way we'd get lots of variety and maybe enough extra fruits and veggies to put something away for later. We started with every other week but I was quickly finding that with 2 (and a half) eaters, we just couldn't keep up and I didn't want to keep composting it all. So, now we're at once every 4 weeks and that is working out pretty well for me.

One of the most interesting things I've been learning is what's in season--right here, right now. Its really helped me in the grocery store, as I can look at certain fruits and veggies and now I KNOW right off the bat that they've been imported (probably from Chile, our opposite season partner). I've also been learning A LOT about new fruits and veggies. In our box, you get what's being grown at the partner farms. So, quite frequently I've pulled everything out of my box and had to check the packing list just to identify one (or more!) of the items. I'll admit that most of these things are not particularly exotic but with a Midwest/farm based food heritage, my food exposures were pretty basic. Fruits were apples, oranges, bananas. Maybe some peaches or apricots or grapes for excitement. Veggies were iceberg lettuce, canned green beans, peas, corn and the like.

With each box, I've been trying at least one new thing-- some I've liked and some well...... not so much. But I have to say its been a great example to the little people to see Mom and Dad dive into trying all these new foods. We've had a LOT less arguing and complaining when we are ALL trying something new!

Today I'm gonna tell you the tale of two veggies (I bet you were wondering when I was EVER gonna get around to those!) that if you haven't tried yet, you won't be sorry! To those in-the-know, these are AMAZING! But I definitely never would have tried either if they weren't staring me in the face every time I opened the fridge. So, while I can't magically send some to your fridge to stare at you, I will instead send my encouragement to get out there and TRY SOMETHING NEW!!

First up: LEEKS!
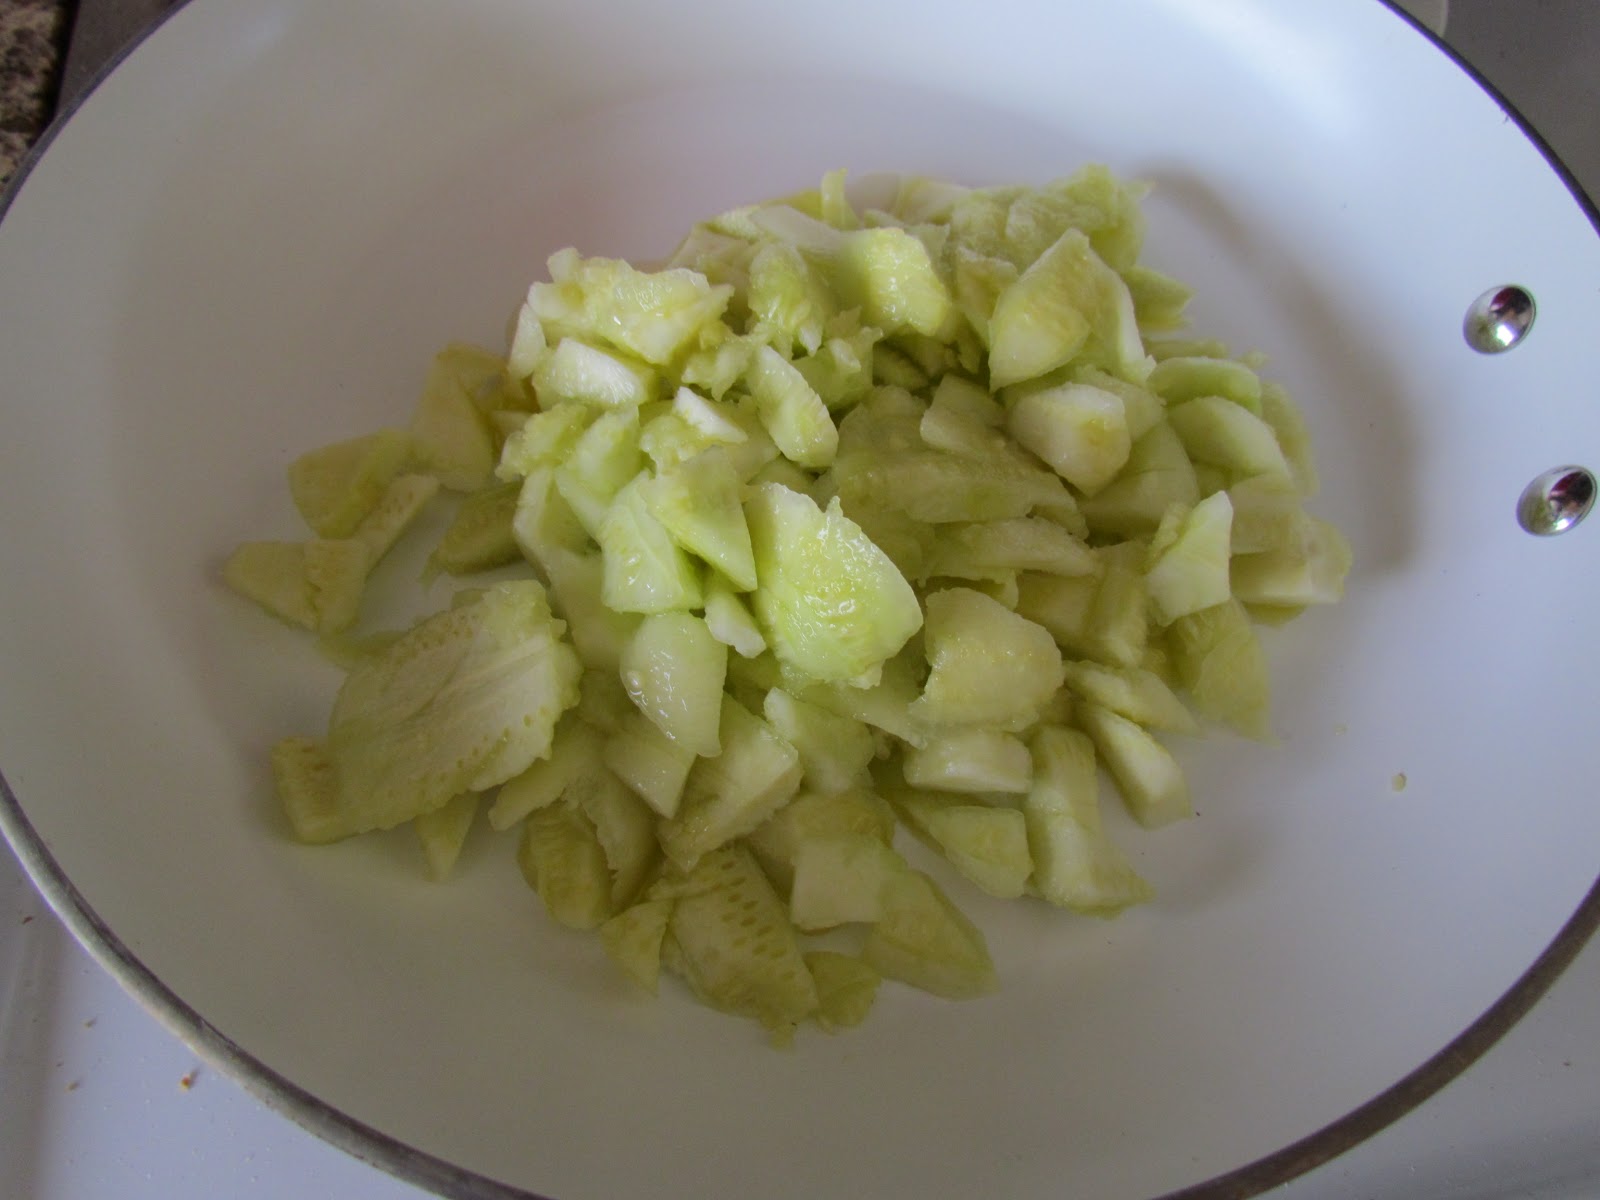
 The first leek we had looked about the size and shape of a green baseball bat! It was HUGE!!!! I had NO idea what to do with that thing. And, I'll admit it.... I kind of dithered, then I delayed and then I put it off a bit more until.... OH DARN, too wilted to use. When our next box had 3 of them, I knew I couldn't let them all go. So I flipped on the computer and did some research.


What in the heck is a leek? It turns out its a relative of onions. They are kind of like green onions from the land of giants. I don't have a great love of onions-- I like their flavor but they don't agree with my digestion and raw is completely out of the question. So I was a more than a little nervous about experimenting with them. But I gathered my courage and I started subbing leeks into any recipe that I'd normally put some onion into and WOW! great (light) onion flavor and NO digestive problems!

How to prep a leek: As they are often grown in sandy/gritty soil, you will definitely need to rinse these well. It is usually recommended to rinse AFTER you cut since the layers are so tight. You can either do one long cut lengthwise and pull the layers apart to rinse (kinda like celery) or slice them thinly crossways and drop into a bowl of water. Let the grit settle to the bottom and scoop the floating pieces from the top. When you are cutting, you typically only use the white and light green portions.


Veggie #2: Swiss Chard
We've been getting LOTS of leafy greens lately -- lettuces of all types, radiccio, spinach and lately chard. I've seen chard called "swiss chard" and "rainbow chard". If you haven't seen chard before, it looks like a big spinach leaf with a colored stem--this can be either light green or colored with pinks, oranges or purples! When we got a bunch of these leaves, with each stem's leaf around the size of an elephant ear (okay, maybe a baby elephant....) I was certainly a bit nervous. I freely admit that big green leafy things do still make me a bit anxious (the lingering 5 year old inside me, perhaps?) I do like spinach occasionally but haven't gotten on board (yet) with the great kale craze that's going on and not having much for southern relatives, I've not had any experience with many other types of greens (collards and the like).


I was greatly encouraged when several sites on the internet described the flavor of chard as being like a mild spinach. I thought "okay, I can do that!". The best suggestion I read was to blanch the leaves before adding to your recipe-- apparently this will reduce any potential bitterness that may be found in these deep green leafies.

To prep chard: Rinse and pat dry individual leaves. Cut out (or yank) the hard center stem and discard. Chop leaves into manageable strips or pieces. I cut mine into rectangles about 2" x 1" and that worked well. Drop into a pot of boiling water for 3 minutes. Drain well. Use any place you might use other cooked greens like baby spinach or kale.

I was so excited about chard that I've actually just planted 9 (!!) little baby plants into the beginning of this year's garden (along with some romaine and arugula). I'm very excited to see if baby chard tastes like baby spinach. I'll get to find out in a few weeks!!

Summary: Any place you would use an onion, you can use leeks. Any place you'd use a green like spinach, kale or collards, you can use chard.

One of the things I love about this recipe is that it took an old favorite (scalloped potatoes and ham) which had little nutrient value (besides calories....) and really beefed it up. Loaded with leafy green chard and leeks, it actually resembles a balanced meal!
 
 
Recipe: Scalloped Potatoes and Ham with Leeks and Swiss Chard
(This was for a VERY large casserole, 14" x 10" x 3")

8 medium/large russet potatoes, peeled and sliced thinly (about 1/8 inch)
1 LARGE leek (white and light green parts) sliced thinly and cleaned
8 LARGE ribs swiss chard, ribs removed, chopped and blanched in boiling water 3 min.
8 oz cooked ham, cubed (about 1/2")
8 Tbs butter
8-10 Tbs flour
6 cups milk

1) In your casserole dish, arrange potato slices in a single layer. Add approximately 1/3 of your prepared leeks, chard and ham evenly over the bottom. Sprinkle salt and pepper over the layer.

 
2) Repeat step one 2 more times (for a total of 3 layers)
3) Spread any remaining potato slices over the top.
4) Prepare thin white sauce:
  1. Melt butter in a large sauce pan over med/low heat.
  2. Sprinkle in flour, stirring constantly until all butter is absorbed and a paste forms.
  3. Pour in milk and whisk to dissolve any lumps.
  4. Cook over med/low heat until sauce begins to thicken slightly (it should be able to coat a spoon)
5) Pour prepared white sauce over entire casserole. Sprinkle salt and pepper over top. Cover casserole with foil.

6) Bake at 350 F for 60-90 minutes (until potatoes are cooked through and easily pierce with a fork or knife). Time will vary GREATLY depending on how thin your slices are-- the thinner you slice, the faster yours will cook!  Remove foil after 30 minutes of cook time. Replace foil if top of casserole begins to over brown. Enjoy!


Feel free to leave comments below. Have you tried either of these veggies? What did you think?

Click the "like" button to add us to your facebook feed.


Friday, September 14, 2012

For the Love of Zucchini, Part 4: Muffins!!

I know I haven't been around as much lately-- just busy around here. You'd think with the big guy starting kindergarten, I'd have all this extra time. It just hasn't worked out that way. First I overloaded my to-do list and got a bit bogged down there. Next I got involved in a bunch of procrastination projects that had been put to the side while hubby was working nights (thank goodness that's over!). Finally I've gotten a few extra minutes but -- so classic-- I've ended up with a terrible head cold. Sheesh. Anyways, it's not that I haven't been doing anything or that I didn't want to write. Hopefully I'll manage to get this finished up without sneezing all over the keyboard (again). Perhaps next week we'll work on some homemade sanitizers??

I really thought I was done with all the zucchini several weeks ago but then I was at Trader Joe's and they had packages of small organic zukes that I just couldn't resist! So once again, I was finding ways to eat them up. I ate a few myself, just boiled, buttered and salted (my favorite easy prep) but that left me with 5  that I still needed to use up! I threw one into a crustless quiche that I sometimes make for dinner and then there were 4.

I decided I really needed to make some zucchini bread. But instead of baking it up in large loaves, I like to take these quick breads and turn them into muffins. It's something I've found works well for banana nut bread so I thought I'd give it a try here, as well. It makes the bread into nice, easy-to-grab single servings. Because this is from a quick bread base instead of a muffin base, these are quite a bit denser than a typical muffin (slightly shorter as well, but not stumpy). Think of these more like "mini loaves" instead of muffins and you won't be disappointed!


Spiced Whole Wheat Zucchini Muffins

Since I had so much zucchini, I opted to do 2 batches. I did one as a fairly traditional spice cake flavor and decided to try out chocolate for the other. I'd never done a chocolate zucchini bread before but it ended up being a big hit with the hubby. I also made these with 100% whole wheat flour. I used King Arthur's white whole wheat (which I've started using in my bread baking). It's NOT bleached or lightened in any way, it just comes from a lighter colored white wheat. This gives it a milder, less "branny" kind of flavor. Its definitely my go-to flour of choice right now!

As I converted this recipe (originally from Better Homes & Gardens checkerboard book) to be whole wheat, I had to add some liquid into the recipe to balance the dryness of the fiber. I've opted to do that with unsweetened applesauce. If you use a more traditional whole wheat, you may need to add more liquids or applesauce to get the batter to the proper consistency. If you use a white (not whole wheat) all purpose typical flour, omit the applesauce all together. Also, be sure to drain your zucchini well before adding it to the batter!

Chocolate Whole Wheat Zucchini Muffins

We ate a few of the finished muffins, then I set them out on baking sheets to freeze individually overnight. I'm storing them in the freezer in a large gallon ziptop baggie. This has worked amazingly well to keep the muffins from sticking together. I've been sending one to school with the little dude for snack time and as I've been sending them frozen, they've managed to hold together long enough for him to eat (at least according to him...).

If you don't have enough zucchini to do both kinds but want to try them both out, the base is the same for each. Simply omit the spices (cinnamon, nutmeg/cocoa) during mixing. Separate the batter in half and then add the respective spices to each batch (remember to halve the amounts!).

Version 1: Whole Wheat Zucchini Bread-Muffins (yield 12 muffins)

1 1/2 cups white whole wheat (see note above)
1 tsp ground cinnamon
1/4 tsp ground nutmeg
1/2 tsp baking soda
1/4 tsp baking powder
1/4 tsp salt
1 cup sugar
1 cup finely shredded, unpeeled zucchini (about 2 small)
1/4 cup cooking oil (I used refined coconut oil)
1 egg
1/2 cup unsweetened applesauce
1/2 cup chopped walnuts (optional)

1) Grease or line all 12 standard size muffin cups. (Silicon liners need not be greased) Preheat oven to 350 F.
2) Combine dry ingredients (flour, spices, baking soda, baking powder). Set aside
3) In a medium mixing bowl combine sugar, zucchini, oil, applesauce & egg-- mix well.
4) Add dry mixture to zucchini mixture. Stir until just moistened. Fold in nuts (if using)
5) Spoon batter into prepared cups. Fill approximately 2/3 full.
6) Bake at 350 for 25-30 minutes (wooden toothpick inserted in center should come out clean).
7) Cool on a wire rack. Remove liners if using silicon. Keeps in a sealed container for 2-3 days (in refrigerator) or freeze individually.


Version 2: Whole Wheat Chocolate Zucchini Bread-Muffins

Follow directions in above recipe EXCEPT:

1) Omit cinnamon & nutmeg
2) Add 1/3 cup unsweetened cocoa powder. (This will be lightly chocolate flavored, feel free to increase this if you LOVE chocolate)
3) Optional add in: 1/2 cup chocolate chips. (I didn't do this the first time but probably will the next time, to up the chocolate factor!)

Mix and cook as directed above!!


Feel free to comment below and let me know if you liked this recipe or thought it was interesting or had a suggestion!!

Click the "like" button to follow us on facebook (I promise not to clog up your newsfeed with lots of junk!)


Monday, August 27, 2012

For the Love of Zucchini- Part 3: Zucchini & Potato AuGratin

Yes, we're still on zucchini. Those of you stuck with bushels full of 'em will hopefully thank me. Those who don't-- hopefully you're getting some ideas to take advantage of this underappreciated veggie! Paired up with a nice piece of grilled salmon, this dish makes for a simple entertaining supper or a great way to perk up a boring Wednesday.

This recipe is pretty simple. Even simpler if you have a mandoline or other slicing machine. The thinner the slices, the faster it will cook and the more attractive the presentation will be. You can, however, pull this off without a specialized piece of equipment. A little bit of time and a sharp knife will net you equally lovely results.

I know it seems like a lot of work. It does take a little time to assemble but you can do this in advance. The day I cooked this,  I knew was going to be super busy. So I prepped the whole thing in the morning, covered it in foil and popped it in the fridge. Later in the day, I pulled it out to let the glass dish warm a bit before throwing it into the oven. You could probably even prep this the night before, so long as you really wrapped it tightly and kept it refrigerated!


Recipe: Zucchini & Potato Au Gratin

2-3 zucchini
4-5 peeled potatoes (russets or yukon golds work great here)
2 Tbs butter + more for pan
2-3 Tbs flour
1 1/2 cups milk
1/4 cup shredded parmesan
salt/pepper to taste

1)Melt 2 Tbs butter in the bottom of a medium sauce pan on med/low heat. Add flour until a thick paste (roux) is formed. Cook paste for 1-2 minutes. Add milk all at once and WHISK to remove lumps. Cook, stirring continuously until sauce starts to just thicken slightly-- you will start to feel a resistance against the spoon and the sauce should coat the spoon. Don't over thicken! Remove from heat and set aside.


2) Generously butter bottom and sides of casserole. For a small family dinner, I used a glass 9x9 brownie pan.
3)Thinly (between 1/16 & 1/8th of an inch) slice 1 potato. Arrange slices in a single layer across the bottom of the dish.
4) Thinly slice one zucchini. Arrange slices in a single layer over the potato slices.
5) Lightly sprinkle zucchini layer with salt and pepper.
6) Repeat slicing, layering & seasoning until you reach about 1/2 -3/4 of an inch from the top -- this ended up being 8 layers for me (4 each of zucchini & potato)
7) Carefully pour prepared white sauce over layers.
8) Sprinkle parmesan cheese over top.

9) Bake in a 375 F oven for 30 minutes. Check for doneness. A knife should slide in pretty easily. If there is a lot of resistance, continue baking, checking every 5 minutes. Times will vary depending heavily on thickness of slices and number of layers. The thinner the slices and shorter the stack, the faster the whole thing will cook. (Mine took about 45 minutes) If the top starts to get over browned, simply cover with foil and continue baking until done! (If you want a more elegant presentation, let the whole thing cool for 10-15 minutes so it sets up a bit instead of plopping it on a plate and eating it hot out of the oven, like I did)


Saturday, August 25, 2012

For the Love of Zucchini, Part 2: Zucchini Cheeseburger Boats


So its definitely zucchini season around here! Lots of lovely squash are popping up at the market, in the garden and in our biweekly farm box. As I mentioned previously in part I: zucchini pancakes, with a (semi) picky 5 year old and a hubby who will eat pretty much anything-- except zucchini--, its a challenge to find ways of hiding, covering, or otherwise disguising this perfectly nice veggie!

Of all the different ways I've prepared zucchini, the pancakes have been hubby's favorite. I think, for him, it is the application that best disguises the zucchini. However, as many people are aware, sometimes the best camouflage involves hiding something in plain sight! If you would ask the fellas if they'd be willing to eat 1 or 2 whole zucchini, I can tell you for a fact that the answer would be "No, thank you!" (perhaps not so politely worded). And yet, each of the several times I've made this dish, the little dude has had one complete serving (1/2 of a whole zucchini) and the hubs has had at least 2, sometimes 3 boats (which is 1 to 1 1/2 whole zucchini). Each has eaten their portions WITHOUT grumbling, complaining or face making. Yay!!!

Now I'm not going to claim originality on this dish. If you do a simple search for zucchini boats on something like www.allrecipes.com or the like, you will find tons of choices. This is a great base recipe that can be easily adjusted for your family's preferences or interests. Consider adding taco seasoning to the browned beef, topping with sour cream, chopped tomato & diced green peppers for "Taco boats". Swap out the ground beef for sausage, stir in tomato sauce, top with mozzarella for "Pizza boats". The only limit is your creativity!


Recipe: Cheeseburger Zucchini Boats

3 small/medium sized zucchini (if yours are too big, cut to fit your baking pan, save extras for later use)
1/2 lb. ground beef (I used 85%, grass fed)
garlic salt, pepper, worcheshire sauce
cheddar cheese, shredded (I used an organic white sharp cheddar)
diced tomato (mine were from MIL's garden!)
mustard (I used honey mustard but even yellow would be fine)

1) Rinse, dry and cut stem ends off zucchini. Cut lengthwise in half.
2) Using a metal spoon or melon baller, scoop out zucchini innards (SAVE THESE) and hollow out the interior of the zucchini. It doesn't have to be perfect but try not to get the sides too thin or the cooked boats will be too floppy!

3) Lay your prepared boats in a glass baking dish. Microwave on high 2 minutes at a time, rotating and checking for doneness. Depending on the size of your zucchini, this can be as little as 4 minutes and as much as 10. Don't overcook as these will continue cooking slightly in the oven.
4) Chop up your zucchini innards and add to a skillet with your ground beef. Add your normal burger seasonings--- I like a good hearty sprinkle of garlic salt, a smaller pass with the pepper shaker and a good couple of splashes of the worcheshire sauce.


5) Brown beef/zucchini mixture. Make sure meat is fully cooked and zucchini has softened.


6) Use a slotted spoon to transfer mixture into pre-cooked boats.(this will keep down the extra liquid from the meat & zucchini guts)
7) Top with shredded cheddar (or cheese of your choosing!)

8) Pop into a 400 F oven for about 5 minutes (just until cheese gets melty)
9) Top boats with diced tomatoes, shredded lettuce, chopped pickles or any other favorite burger toppings.

10) Zigzag across the whole thing with mustard (or ketchup or both!).

11) Grab a fork and knife and DIG IN!

I've found that 2 boats are an appropriate adult-sized serving. One boat for the little guy. Hubby can sometimes eat 3. So these 3 zucchini (6 boats) feed us perfectly. You could also add a side dish here of some fries and/or fruit to fill it out. When the toddler starts eating more table foods, we'll definitely need to add on here. If you have tons of zucchini, double the batch & save for later. Left overs freeze BEAUTIFULLY!!

Feel free to comment below and let me know how this worked out for you!

Click on the "like" button below to follow us on Facebook!


Tuesday, July 24, 2012

Veggie Variety: Zucchini Pancakes

Well, its getting to be that time of year--- zucchini season!  It's on sale in the grocery store, turning up regularly in my farm basket and people at work and school are starting to bring in bag loads to get rid of. Now, I'm a fan of most squash varieties but I have to admit, I do get a little bit tired of eating it when I have to do it all by myself. The Hubby-- who is known for eating just about anything-- scrunches up his nose at it (unless its breaded and deep fried).  And heaven forbid you should put something green --that isn't broccoli -- in front of the little dude!  So what's a girl to do?? I had to try to find some way that I can eat the squash I like without torturing the rest of the family or having to resort to deep frying. Enter..... zucchini pancakes!!  I've made these several times over the last year or so and managed to get two avowed squash haters to down their portion with little to no fuss!


I was intrigued by this recipe when I first saw it on an old episode of "Barefoot Contessa". Ina Garten was also trying to find something new to do with all the zucchini she had gotten out of her garden. I thought this idea was a great way of using the zucchini where it is certainly present but not in your face. It doesn't completely hide the zucchini (I'm not a fan of hiding veggies, in general) but the flavor is very mild, basically like a potato pancake but with zucchini instead.

I serve these with a side of dip-- usually homemade ranch but any creamy type of dressing will go well here.  Sometimes I just keep it simple with a blop of sour cream on top. If you like fancy, try a dollop of creme fraiche and a sprinkling of herbs. If you like applesauce on your latkes, you might like it here as well.

The only trick to this recipe is to keep an eye on the batter. Zucchini vary wildly in terms of water content and the longer your grated zucchini sits, the more water will separate out. This means that you may need to add flour if your batter sits for a while or its a particularly moist zuke.

Recipe: Zucchini Pancakes (adapted from Barefoot Contessa, Food Network)

1 large zucchini or 2 medium
1/4 - 1/2 yellow onion
2 large eggs
3-8 Tbs. flour
1/2 tsp baking powder
1/2 tsp salt
1/4 tsp black pepper
butter for cooking

1) Grate zucchini & onion (a little goes a long way, I like 1/4 but if you LOVE onion, try 1/2) into a medium sized mixing bowl.


2) Lightly beat eggs and add to mix.
3) Stir in 3 tablespoons of flour, baking powder, salt & pepper.
4) Check consistency of batter-- if its too watery, add more flour 1 Tbs at a time. Be sure to check batter over time as well & add flour as necessary to maintain correct consistency.


5) Preheat your usual pancake pan on a medium heat. Add small pat of butter to heated pan. When butter is melted, lower the heat slightly (not all the way to low).
6) Spoon mounded tablespoons of batter onto melted butter. Cook as you would a typical pancake, until both sides are browned and middle is set. Watch heat-- too high will result in browned but mushy pancakes, too low and you'll be there all night. You know you are doing it right when it really looks like a breakfast pancake (albeit slightly green). A couple of these in the pic below probably could have been left on the pan for another minute or two.


Did you give these a try? Comment below and let us know how they turned out!

Click on the like button below to follow us on Facebook.

Monday, July 2, 2012

Pinned It! : Waffle Hashbrowns

So I've been skimming Pinterest for some time now and I've gotten some really great ideas for practical projects, some common sense solutions (why didn't I think of that?) and some really awesome inspirational photos to keep me motivated! I've especially been living on the food boards, looking for new ideas in the kitchen!

I tried no less than 3 different cooking ideas I saw as pins on Pinterest last week. First was a totally quick food project for the 5 year old's preschool 4th of July party-- which I had forgotten about until 8 pm the night before. I had to make do with what was in the pantry. Thankfully, I found this pin and was able to more or less get something similar that we could bring the next day.


Memorial Day Pretzels by www.cupcakesandcashmere.com

Item number 2 was this pin that I was very excited about as I've had 3 beets hanging around the fridge for a week from our last farm box delivery. I've never eaten a beet that didn't come out of a can before (and can I say ewwww!). I was hoping that making chips our of them would take away some of the fear of the unknown for me. I even bought a new mandoline slicer just for the job ($20 @ Target!). They looked great going into the oven but they were a TOTAL FAIL!!! Half of each chip was getting too brown and the other half wasn't crisping. I ended up with a mix of overdone and underdone chips (with about 3 actual chips being done correctly). I think I might have sliced too thinly or perhaps too unevenly?

Baked Beet Chips by http://acozykitchen.com


Last night was pin #3. I saw this pin several weeks ago-- sometime before Father's day I know because I was thinking of doing these for Hubby. But, I made him a chocolate cinnamon roll from SmittenKitchen instead. I've been thinking about this since then but it seems like too much effort for breakfast (I really don't like anything more complicated than microwaving or toasting in the morning). So, yesterday when we were looking for a sidedish to go with our burgers (with homemade whole wheat buns but that's another post...) I thought it might be a good time to give this a try.


Waffle Maker Hash Browns by http://www.justgetoffyourbuttandbake.com

Overall, I thought it was a success. I spread my shredded potatoes fairly thin-- the Hubs likes his hash browns more crispy than not. The results were nice mix of brown crisp squares and soft white shreds. I used 3 medium potatoes and got 4 not quite waffle sized patties. I only sprayed some oil on before the first batch and there was NO sticking what-so-ever! If you have a well-seasoned waffle maker, you can probably go with no oil at all.

My Waffle Hash Browns (about 1/2 way done cooking...)


We all agreed that it worked pretty well. Since I have a very small waffle maker, it did take some time as each person's patty had to be cooked individually. But I really liked that I didn't have to stand and supervise a tempermental pan of hot oil (and clean up the inevitable mess afterwards). I would definitely try this idea again but I think I would instead try a larger portion of potato, cooked longer. I'd also like to try a mix of vegetables-- I think sweet potato could be interesting here and I have a zucchini patty recipe that uses shredded squash and onion and I think mixing that with the potato (or on its own) would be worth trying. I'll let you know how it goes!!

Anyone else try something they saw on Pinterest recently?? Comment below!


Friday, June 22, 2012

Veggie Variety: Parmesan Roasted Green Beans

I've always loved green beans, especially at Thanksgiving when Grandma would let them simmer in her big cast iron pot on the back of the stove ALL DAY with some onion & bacon. Tender, succulent and with a hint of smokiness, they basically dissolved in your mouth.

I've never gotten similar results cooking them myself and everyone keeps telling us that we really aren't supposed to cook our veggies until they are mush. I've had a bit of a phobia of other people's green beans because they are often much, much too al dente for me. I've been working on cooking veggies (and in particular green beans) less, to better preserve the nutrients & flavor. This recipe is flexible because it will taste great whether you like them on the crunchier side or softer side-- you're the boss!!


Recipe: Parmesan Roasted Green Beans


Ingredients:

3/4 lb fresh green beans, washed & ends trimmed
1 tbs olive oil
salt & pepper to taste
1/4 cup shredded parmesan cheese

1). Drop beans into a gallon size baggie (I either use the cheapie kind that requires a twist tie OR reuse the veggie bag from the store). Pour olive oil into baggie, shake to combine.
2) Pour oiled beans onto parchment covered baking sheet or glass baking pan.
3) Sprinkle with salt & freshly ground black pepper, toss with shredded parmesan.
4) Bake at 375 F. Check at 30 minutes for al dente, 40 or so for softer.


Tuesday, June 19, 2012

Veggie Variety: Cauliflower Baked "Potato"

Getting more fruits, veggies and whole grains in your family's diet requires both the willingness to try new veggies (we're giving bok choy and brussel sprouts a try!) and looking for new ways to cook old favorites.

One of my longtime favorites is cauliflower. I love cauliflower! It doesn't get the positive press that broccoli does but I really enjoy its milder flavor and less "woody" texture.


One of the easiest ways to get in an extra serving of veggies is to swap cauliflower for your starch. You can use it almost any place you'd use rice or potatoes. You'll get the feeling of having a white starch but all the vitamins and fiber of a vegetable! 

Start with 1 head of cauliflower (or a package of frozen florets). Cut florets from the large center stem and boil in water or steam until soft (approx 15-20 min.) Strain in collander over sink. While draining, press excess water out of cauliflower with potato masher or wooden spoon. Getting most of the water out is KEY to a great texture!

  • Mashed "potatoes" : Pop cooked, drained & pressed cauliflower into food processor, puree until smooth. Add cream/milk, butter & salt/pepper as usual. You'll get a great mashed potato texture & creamy flavor!
  • Cauliflower "rice": spread cooked, drained & pressed cauliflower onto cutting board, chop finely with knife until texture resembles rice, use anywhere you would white rice!
For something decadent, especially if you have some avowed cauliflower HATERS, you have to try the following recipe. It looks, tastes and has the texture of your favorite steakhouse big baked potato with all the trimmings!

Cauliflower Baked "Potato"


Ingredients: (serves 4, multiply as needed)
1 head of cauliflower, prepared as above
4 oz cream cheese or neufchatel
4 oz sour cream
1 cup shredded cheese (sharp or medium cheddar works well but for something really awesome, try a SMOKED cheese)


1. Take cooked, drained & pressed cauliflower and continue mashing with potato masher or large fork. Break it up into fairly small chunks but it doesn't have to be perfect-- you are going for a rustic, baked potato type of texture here.
2. Put prepared cauliflower into a 1-2 quart casserole dish that has a lid.
3. Using your fingers, pinch off small pieces of the cream cheese and drop into casserole. Mix together when done.
4. Mix in sour cream, shredded cheese & salt/pepper to taste.
5. Bake covered in 350 F. oven for 20 minutes and then uncovered for another 10.
6. Casserole is done when lightly browned and bubbly at edges.


To take this up a notch, try topping with crumbled, cooked bacon and diced green onion!

Comment below and let me know how this worked out for you....


This recipe is adapted from this post.


Wednesday, June 13, 2012

Veggie Variety: Grilled Artichokes

As a Mom, a lot of what I do is food based-- buying food, preparing food, serving food, etc. When you add in an effort to try to get the family to eat more whole foods-- fruits, veggies and whole grains, you also have to add in a LOT of recipe research as well! 

I've been following several blogs, skimming pinterest and checking in with my facebook recipe group to get new ideas for familiar healthy foods or how to instructions for preparing foods that are completely new to me. I thought I'd return the favor with this family summer favorite-- grilled artichokes.  This is a great, kid friendly appetizer or side dish. Kids love it because they get to 1) disassemble something, 2) eat with their hands & 3) use dip!

      • Completely unnecessary side story: at the Little Miss pageant my Mom misguidedly entered me into when I was about 7 (long, long before things went nutty like on toddlers & tiaras), we were asked what our favorite food was -- all the other girls said normal things like pizza, spaghetti, burgers, etc. Not me, I said artichokes! Needless to say, I did NOT win.

Choosing An Artichoke:

  • find one that has a good weight, unwilted leaves, and less purple streaks near the base: artichokes get more and more purple as they get close to blooming and that means less edible parts. Expect to pay $1-3 apiece. (Yikes, I know!! But its better than spending $8 at a restaurant!)

Prepping Your Artichoke:

  • cut off stem close to the base. You can discard (or pare off tough exterior and cook with the rest)
  • if its particularly prickly, you can also cut off the top 1-2 inches of the pointy end (although I rarely bother and its usually not a problem)
  • cut in half lengthwise
  • use a large metal spoon to scoop out  and discard the thistly part (the choke of artichokes) and any purple leaves. This is NOT edible. Don't worry if you don't get it all, you can tidy up after cooking.

Pre-cooking Your Artichoke:

  • Drop your artichoke halves into a large pot of boiling water. Cover & keep at a low/medium boil for about 20 minutes. Artichokes are ready when a knife will slide into the base near the stem with a slight resistance (you don't want them too soft or they will disintegrate on the grill)

Prepare your Marinade:

  • For 2 artichokes (4 halves), mix together 1/4 cup olive oil, 2 tsp crushed garlic (about 2 cloves), dash of salt & pepper.
  • Whisk together and spoon over cut (open) side of artichokes, so that the oil flows into the nooks and crevices between the leaves.

Heat up your Grill:

  • Place artichoke halves, cut side DOWN, on preheated grill over a medium/high heat. Grill until edges have a nice slight char--about 5-10 minutes.

Serving your Artichoke:

  • You will want a dipping sauce. The simplest is a small bowl of melted butter. You can also whip up the mock aioli sauce below: (I know its not a real aioli but mayonnaise will give you the same basic idea)
    • Tangy Balsamic Aioli:
      •  1/2 cup mayonnaise (do NOT sub miracle whip)
      • 1 Tbs balsamic vinegar
      • 1 Tbs champagne vinegar (sub red wine or apple cider if you don't have this and add a PINCH of sugar)
      • 1 tsp crushed garlic (1 clove)
      • Mix together until well combined, makes 4 servings!

Eating your Artichoke:

  • Remove outer leaves first, dip previously attached end of leaf, scrape "meat" off of leaf with your teeth (this is the fun part for kids), toss leaves into scrap bowl. Repeat & enjoy!
  • When you get to the base of the artichoke there will be a core left, this is the heart of the artichoke and the very best part. Inspect to make sure all of the thistly choke has been removed, cut into pieces, dip and eat!