road

road
Showing posts with label Simple Basics. Show all posts

Monday, September 3, 2012

Simple Swaps: No more cooking spray!

So when we started down this real food path, I admit I didn't throw out all the bad stuff right away. We mostly just ate through it and replaced it with healthier options. Regular pasta was replaced with whole wheat, white rice was replaced with brown, etc. However, every once in awhile I find something which just doesn't translate very easily into a real food. Sometimes I just choose to do without, sometimes I work to find an alternative.


One of the least natural items we used to use in our kitchen on a daily basis was cooking spray. You know the stuff. Smells like c**p but makes everything glide right off your cookware. The problem is its a completely manufactured substance. Even if you get an "all natural" or organic version, there is still the issue of the propellant. I prefer my food to have less additives and its kind of hippocritical to use processed cooking spray to prepare my locally grown, organic produce or grass fed meat!

So, about a month or so ago, we finally used up the last little bit of cooking spray and have been doing without since then. You know what? I actually haven't missed it at all. I think my hubby (who is always looking for the short cut) has missed it more than me.

So what do we use instead? It depends on the project.

For Baking:
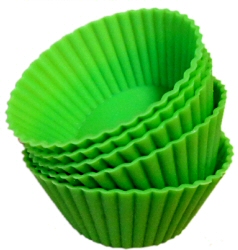
This morning I had 2 bananas desperately in need of being used up before they turned to complete mush. So I did the sensible thing and made banana nut muffins for breakfast! Instead of spraying down my muffin pan, I simply slipped in one of these easy silicone baking cups. The big advantage of these is that you can put things into them that (even with spray) would never release from a muffin pan... like whole eggs. The other nice thing about these cups is that you can remove them after the muffins cool and then store your extra muffins in a baggie in the freezer without worrying that paper liners will get soggy and bond to the muffin itself (I had that happen once). And, in a pinch, you can even bake stuff in them WITHOUT the pan-- although I've never been brave enough to try it!

What about cakes or other larger baking projects? Go old school! Butter, it's my friend, it's your friend!


For baking things like cookies or fries that you might not want to add any extra butter or oil to, consider a silpat mat. They are flexible mats made of silcone that come in various sizes that fit most baking sheet pans. Anywhere you might want to spray or use parchment paper would be a good place for a silpat. Since they are silicone, nothing sticks to them. I actually use mine pretty regularly but I especially give it a workout at Christmas time when I'm doing alot of candy making. I pour my molten peanut brittle over it directly and when its cool, it peels right off without having to have a buttery residue!

 
For Skillet cooking:
Butter is your friend here as well. I used to cook my breakfast egg(s) in a pan slicked with cooking spray. Now, I throw a small pat of butter in there and enjoy the extra flavor!
 
For Skillet Frying:
For things that I don't want a buttery flavor for (like searing meat) I have loaded up my refined coconut oil into a simple oil dispenser that I actually found at the Dollar Store. One buck and I've got an easy way of getting a teaspoon or two of oil into a pan with no fuss and no muss!
 
More direct replacements:
 
1) Misto. This is an ingenious device that allows you to load up your cooking oil of choice (I like olive oil as an all purpose oil due to the tendency of coconut oil to seize up in cold weather). A few pumps of the top and you've pressurized it enough to actually make your oil into an aerosol. By far the closest and easiest replacement. The only downside is that it's a little expensive-- I've seen cheap ones for as little as $9.99 and typically they run more like $14.99.  We currently have one of these and it does work great. Ours is currently filled with lemon juice that the hubby is using to baste meats on the barbecue. We'll probably eventually (when grilling season is over) dump that out and put in some oil.
 
 
2) DIY. I have seen on Pinterest, several posts on making your own cooking sprays using a simple trigger sprayer (which cost like a dollar at Walmart). I have given this a try but haven't had 100% success with it. For me, it does coat okay. For Hubby (who likes to use it on the grill to keep meat from sticking) he doesn't think it coats enough. Also many of the techniques have you add water. I've found that even with keeping it in the fridge that the water started to get cloudy after a week or so. While its probably nothing, I feel the need to dump it out. That is a waste of perfectly good oil and kind of annoying. One other thing to think about is the fact that these cheapy sprayers are not typically made with food grade plastics. Just something to be aware of. Check out the website in the pic below for a how to tutorial if you want to give it a try. (She also has lots of other good green housekeeping tips!)


Saturday, July 28, 2012

Its Freezing Time!!

Its really getting into the best (food) parts of summer. Corn, strawberries, blueberries, peaches, plums, cherries, cantalopes, tomatoes, zucchini, yellow squash are but a FEW of the crops in season right now. Whether you're a backyard farmer or just a savvy shopper, now is the time to take advantage!

I know I already did a post on freezing. AND, its soooo super easy that people probably don't need to read about it. BUT, until recently, it didn't even occur to me to consider using my freezer this way. I always thought about canning during summer but never had the nerve (or equipment) to do so. This is definitely the cheap and easy way to get more fruits and veggies into your family's food plan!

As I talked about in my previous post: Less time= less money, much of the work of kitchen projects can be reduced by just doing a few extra items when you are already prepping. A week or so ago, the family had some nice grilled corn on the cob at dinner. Instead of just doing up 3 for the family, I had the hubby do 5. Since he was already cooking corn, a few more made very little difference. After dinner, I cut the kernels off of the cob, dropped them into a ziptop baggie and threw it into the freezer. Just last night, for an easy supper, we did burritos. It was so nice to be able to pull out just a 1/4 or 1/2 of cup of already cooked corn. A few seconds in the microwave and we had a nice veggie addition to our wraps!

We've also been getting a lot of fruit in our farm boxes and we're starting to get a small stream of family/neighbor garden goodies as well.  I already have some peaches put up and I'm off to do some blueberries and strawberries today. I'm looking forward to reaching into my freezer in the middle of December and pulling out a little piece of summer!


Why Freeze?
1) Fruits and veggies saved now will taste better. When you save something picked at the peak of season and locally produced, the flavor can't be beat. Freezing will preserve those qualities!

2) Frozen fruits and veggies are better for you (and the environment) than trying to get them off-season later. Freezing got a bad rap somewhere along the line but it is, in fact, a GREAT way of preserving foods. Freezing has been shown to keep a higher nutrient level in fruits and vegetables than any other way of preserving-- especially if you freeze them as close to the time they were picked as possible. Think of your foods as having a timer inside of them. As the time ticks down, more and more of the nutrients and flavor inside the foods will disappear due to enzyme activity and oxidation. So if you are buying those strawberries from Argentina in December, consider how long it took them to get to your local grocery store (and what nutrients are likely to be left in them) AND what kind of environmental impact there is from transporting them.

3) Freezing IN SEASON saves money. Whether you are buying frozen fruits and veggies or fresh imported ones out of season, there will be a premium to be paid. Right now, farmers need to get that produce sold and distributed-- they've got a limited window to move that food and prices reflect that. Its especially true for organic produce -- this is the best prices you'll find all year! And, if you are lucky enough to have your own garden or have friends or family who do, nothing beats FREE!

4) Its SOOOOOO easy!! While many people out there are big canners, I haven't quite gotten up the nerve to tackle that skill yet. But what I can do (and so can you!) is freeze. Most fruits and veggies will require a little bit of prep-- but is a small price for the payoff of a well stocked freezer!

Materials:
Seasonal produce (organic, optional)
ziptop baggies
baking sheet
parchment paper. wax paper or silicon mat
prep tools-- peeler, knife, cutting board

Prepare produce as you will want to use it (peel peaches, slice/hull strawberries)
Spread produce evenly on a lined baking sheet.
Put in freezer for several hours or overnight.
Place fully frozen food into baggie, remove as much air as possible and seal completely.
Label food with name & date!


Monday, June 18, 2012

DIY Cooking Basics: Balsamic Vinegrette

For a quick, easy & healthy dinner, nothing beats a salad. As the heat begins to turn up in summer, this is especially true! It seems like everyone is looking for something light and refreshing, full of the bounty of colorful seasonal produce that is peaking this time of year. It also doesn't hurt that salads typically require very little (if any) actual cooking!  

One of the ways that a beautiful, fresh salad can be ruined the fastest is by having someone drown the whole thing in a processed, store bought dressing. They are typically full of preservatives, additives, excess sodium and sugar. The flavor often leaves a lot to be desired as well. Making your own dressing is simple, inexpensive and just about guarantees a rave review!

My Favorite Summer Salad: Strawberry Grilled Chicken Salad!

  • Bed of mixed baby greens or baby spinach leaves
  • grilled chicken breasts, chopped
  • crumbled feta
  • candied walnuts (in the popcorn or baking aisle)
  • sliced, hulled fresh strawberries
  • Homemade balsamic vinegrette (see recipe below)


Balsamic Vinegrette  (per person, multiply as necessary)
  • 1 Tbs (15g) light flavored Olive or Canola Oil
  • 1 Tbs (15g) balsamic vinegar
  • 1 tsp (5g) dijon mustard
  • 1/2 Tbs (10g) honey (if you like tangy, reduce or skip this)

  • If you have a food scale, put 16 oz measuring cup on scale and zero out. Add each ingredient by weight, zero between items.
    • If no scale, use volume measurements. Add all ingredients
  • Whisk & serve immediately
  • Extra can be stored in closed container in refrigerator. Use within week. Shake before using!


A Few Other Salad Ideas To Try:
  • Mexican: Romaine, grilled corn, black beans, cotija cheese crumbles, crunchy tortilla strips, cilantro & a nice grilled tri tip all topped off with a spicy salsa
  • Italian: Iceberg, tomatoes, red onion, pepperocini, seasoned croutons, sliced pepperoni or salami, a sprinkling of shredded parmesan dressed with a tangy vinegrette
  • Chinese Chicken: Shredded cabbage, shredded carrots, mandarin orange segments, crispy wonton strips, soft poached chicken pieces topped with a ginger sesame vinegrette
  • Japanese: Romaine, edamame, toasted sesame seeds, seared ahi tuna and a spicy wasabi ginger vinegrette
  • Buffalo Chicken: grilled chicken marinated with buffalo sauce (try Frank's red hot!), iceberg lettuce, tomato, butter toasted croutons all topped with a creamy blue cheese dressing.

What's in your favorite salad? Comment below!!

Sunday, June 17, 2012

Sunday Savings Tip: Bananas

If you are anything like me, you compulsively buy bananas at the grocery store. Sometimes the little dudes will gobble them up in a few short days, sometimes even the hubby packs a few for his lunch. And then sometimes you get to the end of the week and end up with something that looks like this:


Its kind of embarrassing. I hate throwing away food but they are just too mushy to be good for out of hand eating. However, they are GREAT for baking, smoothies and in babyfood (see this post). But by the end of the week (when I'm stuck with all these brown & spotted bananas) I might be too busy, tired or just not in the mood for banana things.  Simple solution: FREEZE them. That's right, they freeze beeeauuuuutifully! Just pop off the peels and any bruises, halve or slice and drop them in a baggie.


They'll work well in any recipe calling for mushed bananas AND you save yourself from wasting food/money plus you'll always have perfectly overripe bananas on hand! As a nice bonus, if you use them straight from the freezer in a smoothie, the result will be a cold and creamy treat closer to a milk shake than a drink!

Friday, June 15, 2012

DIY Done in 10: Basic Compost Bin


As we've embarked on this whole eat more fruits and veggies thing, we've been generating a LOT of green waste-- peels, tops, stems, cores, wilted leaves and the like. Our city waste management company is reasonably modern and provides a free waste can for yard & green scraps. The company then composts this and either uses it on city property or sells it.

It seems to me that it's kind of silly to keep dumping things into the green bin and then turn around and head to the fix-it store to get a big bag of compost or mulch. So, I'm cutting them off! Its my scraps and I'm gonna keep them! So there.

For this project, I was inspired by this post on pinterest.  I also found this list on compostable items very helpful as well!

Materials:

  • 1 very large rubbermaid (or like) tote with tight fitting lid (I used a 30 gal.)
  • 1 drill w/ a 1/2 inch bit
  • shredded newspaper or dry leaves
  • soil (1-2 cubic feet-- I started with 1.5 but may add more as needed to mix w/scraps)
  • scrap bucket for the kitchen (with tight fitting lid if you aren't gonna dump daily)

Instructions:

1. Drill 15 or so holes in the top AND bottom of your tote:


2. Fill bottom of tote with a good few inches of dry leaves or shredded newspaper

3. Add a layer of soil (to approx 1/3 to 1/2 of total depth)


4. Moisten w/garden hose

5. Add compostables, stir, place cover and wait!!

6. Repeat step 4 & 5 as needed to keep soil moist (but not wet or swampy!!)

7. Keep compost bin in shady corner of yard.


Project Analysis:(Out of 4)

Cost: $$$$     Satisfaction: :):):)    Quality: ***       Green Factor: ^^^^

Total cost of materials (tote, soil, scrap bucket for kitchen) was about $15 a similar volume premade one had $99 as its lowest price. So big savings!! An easy 10 minute project that saves over $80 is always a winner, plus I get to reap the "rewards" of our increased green waste. And, I'll get the satisfaction of knowing exactly what went into the compost that will (eventually) be used on our edibles in the garden.

Have you ever made your own compost bin this way? Comment below and let me know how your project turned out!

Sunday, June 10, 2012

Sunday Savings Tip: Resurrecting Wilted Produce!!

My goal for this year, instead of dieting, was to get both myself AND the whole family eating better-- more fruits and veggies, more whole grains, less processed junk! I've had a pretty decent success with it-- but it means buying a LOT more produce than I'm used to. It can also be a little bit more expensive (why do fresh, high quality foods cost more than junk?) and watching your money shrivel, dry up or droop all over your fridge is frustrating.

This week really we overloaded on the produce as we had our first delivery from our CSA co-op. I opted for a larger box, every other week to start with, and I found myself trying to stuff : 1 honeydew melon, 1 1/2 lbs sweet potatoes, 3 fuji apples, 4 peaches, 1 pint blueberries, 4 sweet peppers, 2 lbs of baby bok choy, 1 bunch of carrots (with 18" long tops attached!), 2 stalks of broccoli, 1 bunch of spinach and 2 hearts of romaine-- all into the fridge. This was of course on top of the other stuff I had bought last week that hadn't gotten eaten up yet.

I did manage to get it all in BUT some of the veggies got a little buried on the back shelf. I noticed yesterday that both the romaine & spinach were looking much worse for the wear. This is not necessarily anything new-- its easy to forget about fresh produce if its hidden at the back or down in a drawer. 

Many years ago, I saw a tip on how to resurrect limp celery. You make a fresh cut at the base and stand it up in cup or pitcher of cold (or even icy) water. This will get the water back into the tissues of the plant,  restoring the water and crispness.

I decided to give that technique a try with the romaine first as it wasn't too badly off, just a few droopy leaves on the outside of the head. I cut the base of the romaine heart off and dropped the whole head into a large pitcher of icy water (filled about 6 inches high. I just left it alone for an hour or so and when I checked it-- voila-- perky lettuce greens!!

Now for the big challenge-- the bunch of spinach I had was SEVERLY limp-- not slimy though (this technique will NEVER save those kinds of veggies!). Most people's feelings upon seeing this bunch of spinach would have been to take it straight to the bin. I used the same set up as the romaine, cut about 1" off the bottom of the spinach stems and plopped them into the pitcher-- overnight this time (Not for any particular reason except I was tired and wanted to go to bed!).


When I got up this morning, I was greeted by a very nicely restored bunch of spinach!! Not all the leaves were crisped up but I would say about 90%. Much better than throwing the whole thing out!


This technique can also be used for other stemmy veggies like asparagus. I even remember a cooking show that recommended keeping the asparagus in a cup/vase of water inside the fridge.

Leave a comment below and let me know if this technique was helpful to you-- what veggies were you able to save?

Thursday, June 7, 2012

Homemade Baby Food

For some reason we've come to expect that once our babies reach the 6 month mark, we must begin buying little jars (or tubs or pouches) of ready made baby food. 

Canned baby food is a relatively recent invention, something our mothers surely used but our grandmothers probably did not. The convenience of ready made food is very, very attractive. However, I have found the price (especially for organic labels) to be a bit steep and the choices to be very limited. Apple, pears, peaches & bananas (and a few other combos) are the available fruits. Green beans, peas, squash & carrots are the available vegetables. Personally, I grew tired feeding J. the same few flavors over and over again. After purchasing a few baby food "cookbooks",  I was ready to begin.


The basics of homemade baby food:


Anything you can puree in a blender, food processor or food mill can become baby food.

Young eaters should have single item purees: just apple, just peaches, just peas, etc. (try not to introduce more than 1 new food at a time and wait a few days before trying something else new)

Some simple foods that don't require any cooking at all:
  • bananas- mash well with a fork (wait until meal time to avoid brown mush!)
  • avocado- mash well with a fork (also a very low allergen food item)
  • yogurt - choose whole milk, unflavored, unsweetened varieties

You control the texture: blend longer & add more liquids for thinner, smoother textures, pulse briefly and add less liquids for thicker, chunkier textures for more experienced eaters.

Basic icecube trays make great inexpensive baby food savers. Make food ahead of time, pour into an icecube tray and freeze. Pop out frozen cubes and keep in a freezer ziptop baggie for up to 3 months.  Thaw individual cube servings in refrigerator overnight or in microwave (always check for hot spots!)
  • You can also reuse empty baby food tubs & jars but be careful about reheating- take lids off jars and do not microwave plastic tubs unless you are sure of their material.

The wider the variety of foods you expose them to early, the higher the chance they'll be more adventurous eaters later!


Sample Menus:

Young eaters 6-7 months-- simple single purees.
  • peel, core & chop roughly 2 apples. Add to a sauce pan with 1/4 cup water. Simmer on low until apples are soft. Add to food processor or blender and puree until smooth.
  • repeat above with pears, peaches, apricots, plums, blueberries (reduce liquid), peas, green beans, butternut squash, carrots, pumpkin,sweet potato etc.
  • freeze extras
  • EASY CHEAT: when I'm just not up to all the peeling, coring, etc, I often buy bagged frozen organic fruits and veggies. They cook up the same and have all the same nutrients (or sometimes even more depending on how far your produce is transported!)
  • EVEN EASIER CHEAT: when I don't even have time/energy for cooking up a small batch of food or open the freezer to find I'm out, I might substitute canned foods. Canned fruits and veggies don't even require cooking. Watch out for added sugars and salt!! My favorites: unsweetened applesauce, canned pumpkin (NOT pie filling), canned carrots, peaches, pears. These will all puree up very quickly for a hungry baby!

Experienced eaters 7-9 months -- simple combos.
  • After your child has tried the individual ingredients with no problems, its okay to combine them together.
  • Favorites: apple/blueberry, pear/blueberry, apple/pumpkin, apple/squash, apple/carrot, pears/carrots/squash (*see below for recipe), chicken/pumpkin*, peach/pear/blueberry*, potato/summer squash/peas, potato/carrot/corn*
  • Experiment with texture-- try making purees slightly thicker, adding cooked oatmeal before pureeing or adding cooked rice cereal* to finished puree.

Mature eaters 9-12 months -- adapting table foods.
  • Begin experimenting with light spices-- onion, garlic, oregano, cinnamon, basil
  • Go easy on sugar/salt
  • Offer coarser textures-- rice, pasta, lentils all can add texture-- be attentive to your baby and what he can effectively chew and swallow.

Recipes:


Peach, pear & blueberry
  • 1 peach, peeled, pitted and chopped
  • 1 pear, peeled, cored and chopped
  • 1/2 blueberries

  • Add fruit to a small saucepan, cover and cook over low heat 3-4 minutes, stirring occasionally. Puree in a blender.
Potato, carrot & corn
  • 2 tablespoons unsalted butter
  • 1/2 cup chopped onion
  • 2 medium carrots, peeled and chopped
  • 2 medium potatoes (8oz), peeled and chopped
  • 1 cup vegetable stock or water
  • 1/3 cup corn kernels (fresh, frozen or canned)

  • Melt butter in a pan and saute the onion for 1 minute. Add the carrots and saute for 5 minutes, Add the potatoes, cover with stock/water, and cook over medium for 15 minutes. Add the corn and continue to cook for 5 minutes. Puree.
  •  

Pears, Carrots & Squash
  • 1 cup diced peeled butternut squash
  • 1 cup sliced peeled pear
  • 1/2 cup sliced peeled carrot
  • 1/4 cup water

  • Add all ingredients to a medium saucepan. Simmer over a medium heat, covered until all are very tender, about 20 minutes. Let cool, puree.
Chicken with Pumpkin
  • 1 tbs olive oil
  • 6 oz boneless skinless chicken breast (left overs work well here, just skip oil and step 1)
  • 1 cup cubed peeled pie pumpkin (canned pumpkin puree can be sub. here, don't add during step 2)
  • 1/2 cup low sodium chicken stock
  • 1/2 tsp ground cinnamon
  • 1/4 tsp ground allspice
  • 1/4 tsp ground ginger (can substitute apple or pumpkin pie spice for all of the above, use1 tsp TOTAL)

  • Step 1: In a medium saucepan, heat oil over medium heat, add chicken, turning to brown evenly.
  • Step 2: Stir in pumpkin, stock, & spices, bring to a boil. Cover, reduce heat and simmer until chicken is no longer pink inside and pumpkin is very tender, about 20 minutes. Let cool & puree
  • NOTE: if you use left over cooked, boneless, skinless chicken (like from a rotisserie) AND canned pumpkin, omit the stock and the cooking!! Just dump chicken & pumpkin puree and spices into the blender until pureed!

Project Analysis (out of 4)


Cost: $$
  • It can be a bit of a splurge to get the best, top quality, organic ingredients we all want for our babies.
Satisfaction: :):):):)
  • Making healthy food for your children-- it doesn't get any better than that!
Quality: ****
  • Its very easy to make food equal to or better than commercially prepared baby foods
Green factor: ^^^
  • Controlling the ingredients allows you to buy local, organic, fair trade products that improve the health of our children AND the planet. It also reduces packaging waste.


What I like about this project: Super easy to do! Can do alot at once so I don't have to do it often!

What I don't like: Homemade baby foods do not travel well. Beware the leaky baggie or tupperware!!


Wednesday, June 6, 2012

Simple Sewing: Make your own Valances

Doing this project requires very little skill-- if you can sew a straight line (or mostly straight, in my case) then you can do it!


Before you begin:   You will need fabric, measuring tape/ruler, thread, scissors, pins & a sewing machine. (*if this isn't replacing an existing curtain/valance you will need a curtain rod of the appropriate size)


Instructions:
1. Measure the width of your window. If possible, measure with the curtain rods UP! You will notice that the rods are slightly wider than the window and usually curve around. You need to add ALL of that to your width (*note from experience).  Now if you wish to to have a full valance, add half again the width to your total (for example if your window is 30" including curves, make your total 45") If you want a really full valance, double the number (30" becomes 60")


2. Decide how long you wish your valance to be-- typically they are between 12-18".  Proportionally I think valances that take up 20-25% of the visual space of the window look the best.


3. Cut fabric to the width you selected PLUS an allowance for finishing edges (about an inch on EACH side) So 45" now becomes 47". Make sure any pattern on the fabric is straight before cutting!


4. Cut fabric to the length you selected PLUS 12 inches--this will give us space for the rod.


5. We will sew the sides of the valance first. Fold in first side 1/2 an inch (towards back of fabric) and then fold over again. Pin in place. Continue until both sides are pinned. Use measuring tape to confirm that the curtain is the same width at all points AND that it will be the finished size you wanted. If something doesn't look right, remove pins and correct!! Sew a straight line, making sure to stay on top of the folded fabric at all times.


6. Measure the thickness of your curtain rod (anywhere from 1/2" to 3" is typical) Add 1/2 inch to that for small rods and 1 inch for large rods. This will be used to create the pocket that the rod slides through. We will also add 2-3 inches (artist's choice) for the ruffle at the top. So a 2 inch rod will have 2 (rod) + 1(extra room) + 3 (ruffle) = 6 inches total.


7. Next we will sew the top. Begin as you did with the sides and fold over 1/2". Then, make a big fold that is your rod pocket measurement calculated above (ex: 6"). Pin all the way across and check measurements.  Sew at bottom of fold.


8. Measure down ruffle depth (2-3") across valance, place pins to mark position. Sew a straight line next to the pins. Remove pins. You now have a channel formed between this line of sewing and the bottom of the fold, this is your rod pocket!


9. Almost done now!! Measure & pin height of valance to planned dimensions. Hang valance BEFORE sewing and make sure you are happy with the finished height. You should have SEVERAL extra inches to lower if necessary. If its too long, feel free to cut excess fabric. Once you are satisfied with the result, remove the curtain from the rod and sew across the bottom.


10. For professional results, press with an iron before hanging!


Project Results: (out of 4)


Savings = $$$
  • Typical valances cost $10-50 per unit, with many windows requiring 2-3 units. Fabric costs are as low as $2-3 a yard for basics and $5-10 a yard for designer fabrics, with 1 yard making 1-2 valances.
Satisfaction = :):):)
  • Being able to customize your home to your style is a big part of this project!
Quality = ***
  • Taking your time and measuring carefully will result in professional looking results!!
Green Factor = ^
  • Not much of a bonus here, except to save the collateral pollution created from commercial production & delivery. You can add to this if you start with a previously used fabric (an old sheet, etc).


Project #1: Thomas the Tank Engine in Jr's Room


What I like: Jr. got his Thomas fix for less than $3- found this fabric at Wal-Mart. Much cheaper than the $20 per unit premade.

What I don't like: I forgot to add in the measurements for the ruffle & bend of the curtain rod so its a little skimpy and the top looks flat.


Project #2: Front Windows


What I like: After completely failing to find the color scheme and pattern I had in mind, I was able to make these myself in 2 evenings. I applied the lessons about the top ruffle and was very careful to keep the pattern well aligned between units. While they aren't perfect, they look pretty good to me!

What I don't like: The back fabric is mainly polyester and is a little stiff, so the draping isn't as flowy as I'd like. The pattern alignment from unit to unit isn't perfect but would have dramatically increased the cost of the project-- as it was the top fabric was nearly $10 a yard WITH a coupon at Jo-Ann's.

 Please leave a comment and let me know how YOUR project went!!