road

road
Showing posts with label Recipes. Show all posts

Friday, November 29, 2013

Holiday Turkey Cranberry Wreath

Hopefully everyone had a happy and festive Thanksgiving whether it was just two people or a whole house full around your table!  Now that we've managed to eat our way through all the goodies, its time to tackle the leftovers! My all time favorite use for leftover turkey is to make a turkey cranberry wreath.  I originally got this recipe at a Pampered Chef party I had as a newlywed (so about 14 years ago...) and its really become a family favorite!

One of the things I love about this recipe is that you can customize it in a wide variety of ways-- the easiest (and most helpful if its not the day after Thanksgiving or your brother Joe hogged all the leftovers) is to substitute ready-made rotisserie chicken for the turkey. Once I changed out the craisins for sun-dried tomatoes and swapped in feta and olives and got a really great Mediterranean flavor.  I've substituted in broccoli for the celery when I ran out. The only limit is your imagination!


Recipe: Holiday Turkey Cranberry Wreath
(adapted slightly from The Pampered Chef Kitchen Catalog, Fall/Winter 2000)


Outer crust
     Shortcut Method:
           2 packages (8 rolls each) refrigerated crescent rolls
     Scratch Method:
            Make a half batch of Make-Ahead Butterhorns from Money Saving Mom
                     *1 pkg  (2 1/4 tsp) dry yeast, 4 1/2 cups all purpose flour, 1 cup milk, 1/2 cup butter, 1/2 cup sugar, 3 eggs

Filling:
1/2 cup mayonnaise
2 tablespoons honey Dijon mustard
1/2 tsp ground black pepper
2 cups cooked turkey, chopped (about 12 oz)
1/2 cup celery, sliced
1/2 cup dried cranberries (Craisins)
4 oz Swiss cheese, shredded (about 1 cup)
1/4 cup walnuts, chopped (optional)

1) If using the scratch method, prepare your dough about an hour or so before you'll need it.


2.  Preheat oven to 375 F. Unroll crescent rolls and separate into triangles. On a baking stone or parchment covered baking sheet, arrange 8 triangles in a circle with wide ends toward the center and points directed outward. Slightly overlap touching corners.


2) With the other 8 rolls, align wide ends with first circle and points toward the center. Tips may need to temporarily overlap. Press wide ends of outer and inner triangle circles together.


3) Prepare and mix all filling ingredients together. If mix seems too dry, add mayonnaise until slightly moistened clumps form.

4) Spoon filling over circular seam between inner and outer ring of rolls.


5) Gently fold one triangle point from outside, over the filling, to the inside of the ring. Take the opposite triangle from the inside and fold it over the filling towards the outside of the ring.

6) Continue until all 16 triangles are wrapped around the filling. Press all seams closed.


7) Bake 25-30 minutes or until golden brown. Makes 4-6 large servings or 8 smaller servings. Pair with a salad (or other Thanksgiving leftovers!) for a complete meal.


Saturday, October 26, 2013

Simple Joys of the Season: Mummy Dogs!!

Going along with our Fall theme, we've got to throw in a few fun Halloween related treats. This one is a favorite with my 6 year old. It's super simple -- one of the things he loves is that he gets to help make it! This is certainly not anything new but its just a fun way to do dinner for Halloween or the days leading up to it!

As a side note, I do break my standing rule about processed foods to use the pre-packaged Crescent rolls from the market. Mostly because I rarely have the time to make a batch of dinner roll type dough just for the small amount we'll use here but also because I think its okay to eat these things as treats from time to time. It reduces the mystery and allure of "forbidden foods". It also reduces the whining. For example, my older son knows that the only time I'll buy him sugary cereal (like his favorite Lucky Charms) is on vacation. So he doesn't even ask the rest of the year and he's happy because he knows he when he will get it.

Mummy Dogs:

1 pkg hot dogs (I like uncured, no preservative/nitrates/nitrites)
1 pkg crescent rolls (not the reduced fat ones)


1) Pop open crescent rolls. Unroll and reseal the perforations.


2) Cut thin strips (about 1/4-1/3 of an inch) across the dough.

3) Wrap the dough strips around the hot dog, making sure to tuck or press together any loose ends. Be sure to let some of the hot dog peek through.

 
4) Place mummy dogs on a baking sheet and bake according to package directions (approx. 10 min @ 350) until golden brown.


5) For an extra bit of fun, add some eyes with ketchup. Enjoy!


Tuesday, October 22, 2013

Simple Joys of the Season: Sliced Apples with Vanilla Cheesecake Dip

Whew! It seems like its been a while since my last posting. Fear not! I have not abandoned you! I've been working a lot in my sewing room, trying to really make a go of my Etsy craft store. Right now I've just been putting up napkins-- see this post for how to make your own. I am also working on a few other items, baby quilts and the like that I hope to finish and sell as well. Of course, it seems like every time I finish a baby project, I find out someone I know is expecting. I haven't managed to have a surplus yet!

Living in Southern California, I don't get much variation in the seasons. Even so, Fall has always been my favorite. I thought I'd do a series of short-ish posts sharing a few of my favorite Fall recipes and projects.

One of the quintessential fruits of Fall is, of course, the apple. A few years ago, when we moved into this house, we were delighted to learn that it had several different fruit trees. The first summer we got a few pieces of fruit here and there. Then, last year, came the great squirrel catastrophe of 2012. We never saw a single piece of fruit-- not one apple, peach, plum or pomegranate. Sigh.

 
This year we were much more vigilant (and lucky) and were able to get a nice sized crop of all our fruits. We finally saw a decent amount of peaches and plums. And, some of the largest apples we've seen this tree produce. After picking all we could, making three ginormous batches of applesauce and giving away boxes and boxes, I'm still left with a whole crisper drawer plus a big box full of apples. Thankfully we know from past years that these particular apples will save in the fridge for MONTHS!!

While I'm looking forward to many pies, sauces and even just throwing them in a few savory recipes, sometimes its nice to just eat an apple. Now, I happen to be a fan of eating apples with something-- peanut butter or cheese are old favorites. But sometimes you are looking for something a little different. This dip is slightly sweet, easy to throw together and will transform a simple afternoon snack into something special. It has all the flavor of cheesecake without all the baking. Besides being really good on apples (both green and red), it is also fantastic on strawberries and even grapes. This could also be a fun dish for a party, appetizer or a light and simple dessert.

 
This recipe is ridiculously simple-- I'm almost embarrassed to share it-- but really its too good to keep to myself. The inspiration for it came a few years ago when I picked up a pre-cut fruit platter from Wal-Mart. What was interesting about this tray was that it came with a creamy vanilla bean dip. It was so good, it didn't last even halfway through the party. I thought it'd be nice to find a tub that didn't come with a whole tray of fruit. But alas I wasn't able to find it except prepackaged in the fruit tray. I took that as a challenge and created my own version that I'm sharing with you here. After we started eating less processed foods, I was glad that I already had my own recipe as the original was loaded with preservatives and artificial ingredients.


Recipe: Vanilla Cheesecake Dip
(double for a big batch)

1 4oz package of cream cheese
2 Tbs packed brown sugar
1 vanilla bean split and scraped--- OR you can substitute with 1/4 tsp vanilla extract. its still GREAT!

1) Place the cream cheese in a microwave safe bowl. Gently warm in the microwave-- I know this is kind of obvious but please do remove the foil wrapper first! Just 10-20 seconds at a time. You want it very, very soft and slightly warm, not liquefied!

2) Stir in vanilla and brown sugar. Taste and adjust sweetness & vanilla to personal preferences.

3) Serve with cut fruit-- apples or strawberries are my favorite! Store covered in fridge. Re-warm and stir before serving leftovers!


As always, feel free to comment below. I'd love to hear how this worked out for you. I'm always curious about different perspectives & ideas!

Click the "like" button below to add us to your Facebook feed.

Saturday, July 20, 2013

Flourless Peanut Butter & Chocolate Chip Cookies

It's Saturday -- you've been working hard all week-- don't you deserve a cookie (or two)? I know I do!! I found this recipe several weeks ago via Pinterest (Is there anything you can't find on that site?). I'd give credit to the original blogger/site but the link seems to have gone dead. I'm glad I took the time to write it down!

I have to say this is one of the easiest cookie recipes I've ever tried. Very little fussing and you don't even have to break out the mixer if you don't want to! What makes this even more amazing is that it uses NO flour at all. That's right-- NONE! So this is for you, my gluten/grain challenged friends (or if you just happen to be out of flour.....).

Overall, I loved the flavor of this cookie. You really will not miss the flour at all. I also didn't miss the fine dust I inevitably scatter all over the kitchen any time I do use flour! These cookies puff beautifully in the oven. The texture does tend toward the slightly crumbly-- especially when warm. Based on this, I strongly recommend letting these cool for a few minutes ON the pan to prevent unfortunate breakages.

Hungry yet??


Recipe: Flourless Peanut Butter & Chocolate Chip Cookies
Yield: approx. 2 dozen cookies

Ingredients:
1 cup peanut butter (creamy or chunky-- I use a no sugar version w/peanuts, palm oil + salt)
1/2 cup packed brown sugar
1/2 cup white sugar
1 large egg
1 tsp baking soda
1/2 tsp vanilla extract
1 cup chocolate chips (~ 6 ounces or 1/2 a bag)

Directions:
1) Mix all the ingredients together.


2) Scoop by tablespoon (or mini cookie scoop!). You can roll them, drop them or smush them with 2 forks.


3) Bake on a cookie sheet @ 350 F for  about 10-12 minutes for a drop or scoop, more like 7-9 for smushed.


If you get going, you can have cookies in hand in less than 20 minutes. I know that I had the batter together before my oven had even preheated! So get to it!!

As always, feel free to comment or ask questions!! And, if you "like" what you see, click on the button to add us to your Facebook feed!

Friday, April 26, 2013

Kale Chips!!

Okay, I figured I owed you some nutritional penance to make up for the bunny snack mix recipe I posted-- here it is (and relatively painless!)--- kale chips!


If you are like me, you've been hearing about these as they've been rocketing in popularity over the last year or so. I'm never one to jump on the bandwagon right away (especially when it comes to food fads!). But once again, the box of veggies that magically appears on my doorstep once a month has forced me to get out of my food rut and try something new.

A few weeks ago we ended up with not one or two but THREE big bunches of kale in the box. I took that as a sign that I really needed to try some kale recipes. Even though I've really been enjoying the chard (I even planted some in my garden!) the dark green and potentially bitter kale leaves still had me apprehensive.

After rejecting an assortment of recipes for soups and salads, I came across recipe after recipe after recipe for kale chips. After the beet chip debacle, I was a little leery. But it really seemed like a veggie chip recipe that has a minimum of fussing and would get consistent results. Turns out that you can do (pretty much) anything to kale and the results are (practically) fool-proof!

If you haven't tried kale chips, they are worth an experiment. Once cooked, they have the texture of the lightest potato chip ever. Just very light and crisp. A great snack!

For this recipe, I'm using one bunch of kale. After the first test batch passed the rigorous testing from the hubby (a noted crunch-o-holic), I found that Trader Joe's (and other stores) sell bagged kale pieces. All you need to do is sort out any big stems and you are ready to go!

As a side note, I made a big batch of these to have at a game night we were hosting at our house. I was using a bagged kale which was mostly curly kale. The curly leaf bits end up thinner than the flat leaf kale. One guest described them as "ephemeral". They were sooo thin and fragile that we had a bit of a problem with tiny kale bits dropping around the table (and unfortunately getting stuck in guests' teeth!). They were enjoyed nevertheless, although we did have to break out the box of toothpicks at one point. If you are bringing this dish to share, stick with flat leaf varieties (and if you are eating at home, check your teeth before you go out!)

Recipe: Kale Chips

1 bunch (or bag) of kale
1-2 Tbs olive oil
salt to taste

1) Wash and spin or pat dry your leaves.
2) Remove woody stems and cut or tear leaves into chip (1" x 2" ish) pieces
3) Pour 1 Tbs of olive oil into a gallon size baggie (recycled produce bag okay, too)
4) Add in kale pieces. Twist top of bag to trap air inside with leaves. Shake, shake, shake until all leaves are coated. If you have a lot of leaves and the oil isn't coating them all, add the extra olive oil and repeat.
5) Pour out leaves onto baking sheet covered with parchment paper or silpat. Try not to overload the tray. The leaves will need some air space to dry evenly.
6) Lightly sprinkle with salt (I found a little goes a long ways here)
7) Bake at 350 F for 15 minutes. Stir leaves so outside leaves get to middle & vice versa. Try to separate clumps and space out pieces for even drying.
8) Bake for a further 10 minutes. Check for doneness. Dry leaves will sit loosely on the tray and if you shake it, they will slide and make a little dry leaf-type noise. If all the leaves are dry, take out tray. If not, stir and cook for 5 more minutes. Repeat until all leaves are dry.
9) Let cool for 5 minutes. Eat!


These make a great substitute for light snacks like potato chips or popcorn. By making them yourself, you are saving a ridiculous amount of money. I saw this week at the grocery store, a small potato chip size bag of kale chips (an ounce or less) was running $5.99. That's just INSANE. A whole bag of chopped kale cost me $2.29 and made about 6 servings. So let's see that's a savings of over 90%. Nice!

If you are looking for fancy flavors, we gave garlic/parmesan a try and it was a big hit. I just added a teaspoon of crushed garlic to the oil before adding the kale and then sprinkled parmesan over the leaves before cooking instead of salt. I think next I'll try substituting sesame oil for some of the olive oil and sprinkling on sesame seeds.

For more ideas, try looking at this site:  http://www.refinery29.com/kale-chips . They have suggestions for 10 different flavorings to try.

As always, I'd love to hear what you think or how this worked for you! Feel free to comment below. Click the "like" button to add us to your facebook newsfeed.


Wednesday, March 27, 2013

Peeps Bunny Treat Mix

Okay, I know I've been pushing the real food agenda around here......... but around the holidays, I admit I usually succumb to the inevitable cravings for SUGAR! This time of year is my favorite for all the goodies-- jellybeans, chocolate eggs, marshmallow bunnies-- YAY!!  I'll even admit that sometimes.... eh hem.... I have to go back out at the last minute to fill in gaps for the pre-Easter snacking that I've done.

I'm trying to be better this year and will only admit to a few handfuls of jellybeans and 2 of the mini Reese's eggs. But there is NO way I'm gonna make it (or the holiday stash) until Sunday if Momma doesn't get a sugar fix RIGHT NOW!!!!!!!

I have been seeing a load of pics on Pinterest for a "bunny bait snack mix". The variations I've seen involve: popcorn, chex, pretzels, easter M&M's, sprinkles and white chocolate chips and/or "melting chocolate". It looks super cute (and yummy!) but I have to say that even in the midst of a full blown sugar craving I just can't touch that fake chocolate "candy melts" or white chocolate of any kind.

Yesterday, I saw a very intriguing post on making candied popcorn from melted peeps.(www.simplyklassichome.com/2013/02/peeps-popcorn.html) Percolating overnight in my brain, I've come up with my own variation on the bunny snack mix-- swapping out white chocolate with the melted peeps! The texture is similar to a loose rice krispies treat. I'm (and the rest of the family) really enjoying the sweet/salty combo from the popcorn, pretzels, marshmallow and M's.

If you have food dye sensitive folks (or just want to avoid them) feel free to substitute regular marshmallows for the peeps.


Recipe: Peeps Bunny Treat Mix

12 bunny (or chick) peeps
2 Tbs butter
6 cups popped popcorn (if using microwaved, avoid the buttered flavors)
3 cups pretzels (twists or sticks)
1/2 cup M&M's

1) In a large pot, melt butter. Add peeps and stir until completely melted.

2) Add in popcorn and pretzels.
3) Stir until completely coated.
4) Add in M's and stir quickly (to avoid melting or bursting the M's)
5) Spread on a baking sheet covered with a silicone mat or wax paper.

6) Let sit until completely cooled (about 15 min). Break or tear into clumps & enjoy!


As always, feel free to comment below! Click our "like" button to add us to your facebook newsfeed!

Monday, March 25, 2013

100% Whole Wheat Bagels (2 hour recipe)

Okay, so with the real food thing, finding ready made baked goods-- bread and the like-- has been the hardest part. The difficulties in finding unprocessed (or minimally so) products has led me to do plenty of baking experiments on my own. Thankfully we do not have to rely completely on me as the family baker as I did finally find a whole wheat sandwich bread with no extra ingredients that the kids like and a whole wheat loaf that the grown ups like (a little chewier, I use it for sandwiches and toast mainly). I have also been able to find tortillas (both whole wheat and white) with basic ingredients and no additives at both Trader Joe's and Whole Foods.

One thing that I haven't been able to find is preservative or dough conditioner-free whole wheat bagels. Our 6 year old goes through phases where he's really in the mood for certain foods and will eat mainly that for breakfast. Lately its been waffles which I've been cranking out regularly to keep the freezer stocked. But in the last 2 weeks he's asked for a bagel 3 or so times, so I guess its time to make another batch. I made the first one a few months ago as an experiment. I thought they actually came out pretty good. But I wanted to repeat it (the scientist in me!) to make sure the results were the same before sharing it with you. Now that I've got the second batch out of the oven, I think I can safely pass this on to you!

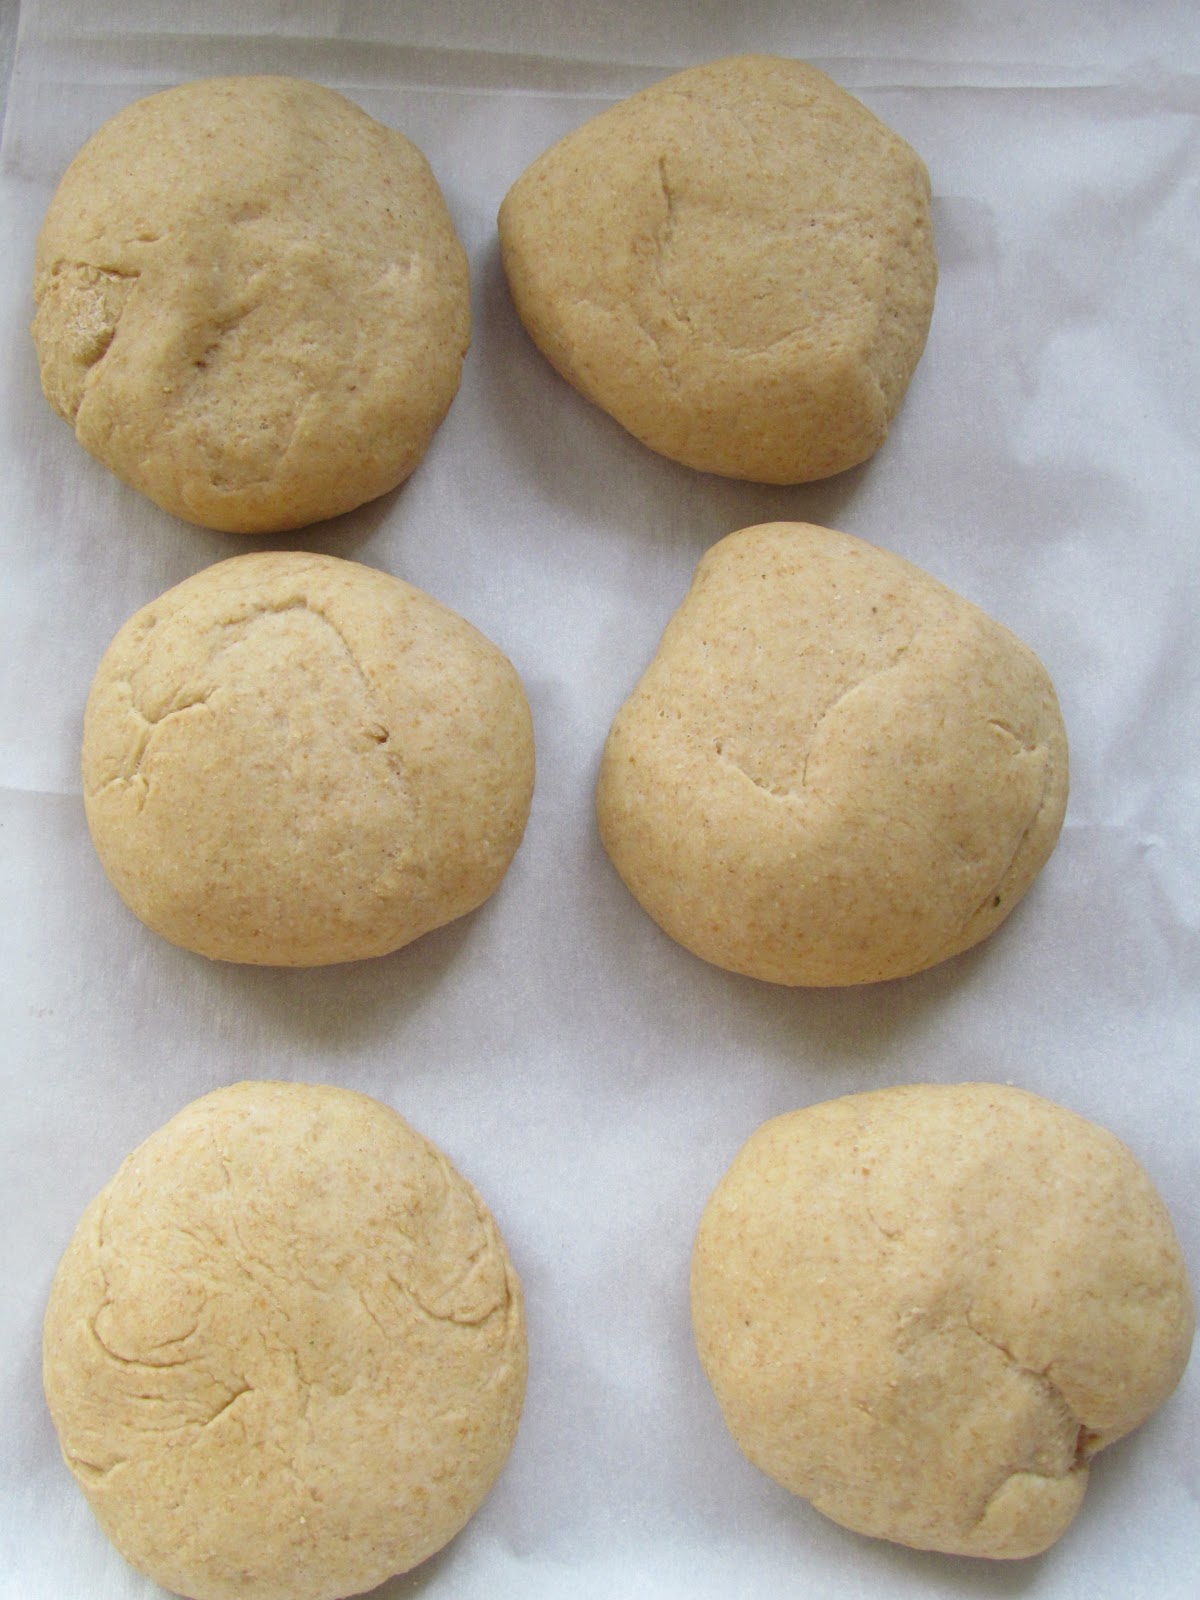
The yield on this recipe will vary depending on what size bagel you make. The first time I divided the dough into 12 equal parts. This made small bagels about the size of the "mini" bagels they sell in the store. Really about perfect for a small child.  This time I opted to divide it into 8 parts as it was a little unsatisfying for the adults and the little dude has been pretty hungry lately (growth spurt coming, I think). The bagels are definitely full size without being ridiculous. If you really want a BIG bagel, you could divide the dough into 6 parts.

Now if you are a bagel snob, you might be disappointed. There are things that are typically done to bagel dough traditionally that we are skipping-- mostly because I do not want to be hunting down specialty ingredients or get involved in a recipe that takes 2 days. However, I personally don't notice the difference and you will get a nice chewy bagel out of this that toasts up great!


Recipe: 100% Whole Wheat Bagels
yield: 6 extra large, 8 large or 12 mini bagels

1 1/2 cup warm water
1 package (or 2 1/2 tsp) yeast
3 Tbs sugar
2 tsp salt
3 1/2 -4 cups whole wheat flour (I like King Arthur's white whole wheat)

1) In a large mixing bowl, pour warm water. Whisk in yeast package and sugar. Let sit until foamy, approximately 5 min.
2) Stir in salt and gradually stir in 3 cups of the flour.
3) Turn out dough and knead in additional flour 1/4 cup at a time until dough is lightly tacky but not sticky--about 5-8 minutes.
4) Return dough to covered bowl and allow to rise until doubled (approx. 1 hour)
5) After dough has risen, preheat oven to 400 F.
6) Fill large pot with approximately 2 quarts of water with 2 Tbs of sugar stirred in. Bring to a simmer.
7) While oven and pot of water are heating, divide dough into desired number of portions.
8) Roll each portion into a ball. Flatten lightly and use one finger to poke a hole in the center. Gently stretch the hole until it is about half again WIDER than you want your final bagel hole. (This time I didn't stretch enough and all my bagels ended up looking like belly buttons because their holes closed up!)


9) Carefully drop one bagel into the boiling pot of water (I recommend topside down for better looking bagels). Let simmer for 30 seconds and then use a spoon or tongs to flip. Allow other side to simmer for 30 seconds. Remove from water, allow to drain and place on parchment covered baking sheet.
10) Repeat for remaining bagels. When all the bagels are finished, if desired, brush with an egg wash and top with sesame seeds, dried onion, poppy seeds or some combination of these.
11) Bake in 400 F oven for 30-35 minutes.
12) Allow to cool completely. Store in airtight container in fridge or freezer!

  
I'd love to get someone else's opinion on these-- are they true enough to traditional bagels? Comment below and let us know what you think!

Click the "like" button to add us to your facebook newsfeed.


Monday, February 18, 2013

Date Night Dinner: Lemon Pasta with Capers & Artichoke Hearts

Hello All!   I guess I haven't posted in longer than it seems! I've been pretty busy with projects around here.... they are not quite ready for posting yet as most of them are scheduled as gifts! I've also taken up KNITTING! I took a 2 night basic class and I've been attempting to finish an "easy" 9 square pillow project kit I purchased 6 (!) years ago-- intending to learn then. I've just about got that sucker finished but I don't think its going to be suitable for public display. On the other hand I've gotten a lot of practice and learned a lot of technique along the way- thank goodness for the internet and youtube! I'm looking forward to finishing this up and moving on to something that hopefully won't look like the dog made it :P

I know Valentine's day was last week (as was our anniversary-- 13 years, yay us!). We went out for our anniversary but I opted to make something special for the whole family for V-day. I paired this up with some beautiful seared scallops (a special holiday splurge) that I seared off with nothing but a small sprinkling of simple salt and pepper. You could also do shrimp or grilled chicken or leave it vegetarian. Completing the simple approach was a nice side salad-- we dressed ours with a homemade blue cheese dressing but a vinegrette would also be good here. Paired with white wine for the grown ups and a sparkling apple cider for the kids, we had a special mid-week dinner that the whole family loved!


Note: For this recipe I actually had "extra" artichokes in the fridge (this is pretty much the ONLY time I've ever had this happen). So, I actually made the artichoke heart pieces BUT feel free to just grab a can from the store-- but be sure to NOT get the marinated ones!

I used 4 smallish artichokes. To prep your own artichoke hearts, first cut off the stem as close to the base of the artichoke as possible. Then, using a firm hand, grasp a leaf and pull up sharply until it snaps off at the base. Discard leaf. Repeat until the leaves are very very thin and you should see a dent or wrinkle between the base of the artichoke and the tip. Cut all the leaves off at that point and discard. Cut the artichoke in half lengthwise (stem to tip) and use a small metal spoon to scoop out the fuzzy, thistle --the "choke". Discard. Cut each half heart lengthwise into 3rds or 4ths and toss into a pan of water. Boil until slightly yielding but not overly soft-- kind of "al dente" - 10ish minutes, depending on how big your heart pieces are.  Drain and set aside.

Recipe: Lemon Pasta with Capers and Artichoke Hearts

8 oz fettucini
2 lemons
2 cloves garlic, crushed (or 1 tsp jarred)
3 Tbs capers, rinsed
14 oz can or pre-prepped artichoke hearts, drained
3 Tbs butter
1/4 cup grated parmesan

1) Cook pasta according to package instructions.
2) Zest 1 of the lemons, set aside
3) Juice both lemons -- be sure to remove any seeds that escape-- I like juicing over my tea strainer!
4) While pasta is draining, melt butter in emptied pasta pan.
5) Once butter is melted, add in lemon juice, zest, garlic, capers, and artichoke hearts.
6) Return pasta to pan and toss to coat. Add parmesan and salt to taste. Toss again.
7) Top with seared scallops, shrimp or chicken, if desired!


Lest you think I am super amazing, there was also a special dessert I made to go with this. Cute little heart shaped strawberry hand pies (all the rage all over Pinterest). Unfortunately, my continued struggles with pie crust and the fact that I only had whole wheat flour in the house yielded some cute but nearly inedible desserts. Thankfully I had purchased some vanilla ice cream to go with the pies. A scoop of ice cream and a sprinkling of chopped strawberries over top and it wasn't too bad.

As always, feel free to comment or leave questions below. I'd love to know how this recipe works for you!

Like us on Facebook to add us to your newsfeed!


Wednesday, January 23, 2013

Best of 2012

Doing a little end of year/beginning of year evaluations on myself. Overall I'm very happy with the changes we've been able to make around the house as well as our eating habits. There are still plenty of projects and goals for the new year, though!

Here are my personal favorite projects of 2012:

1) Dryer Woolie Balls: These had a minimal cost in both $$ and time. I still use them with every load of laundry (so pretty much every day). I love that I can add scent as needed, keeping a very, very light clean scent in our laundry w/o any softners or chemical additives!


2) Bye, Bye Papertowels: This project was also simple and cheap (is there a theme here?) I did have to go back and hem the cut edges of the washcloths I used, but that only cost me about 30 minutes or so of sewing. We keep these in a shoe box size bin right behind the kitchen faucet. Easy to grab and easy to refill. I have seen some people's "unpaper towels" projects with cute fabric on one side and terry cloth on the other side and then snaps on the ends. Then they roll the whole thing up on their paper towel dispenser. I love that idea but our little bin is soooooooo easy to refill (no snapping, no rolling) and if I hadn't wanted to cut the washcloths down to "select a size" paper towel dimensions (that we were used to using) there wouldn't have been any sewing at all. With a total cost of under $10, it also beats the pants of the cutesy ones. Now, I'll admit my cloths are just a basic beige (which thus far is hiding stains remarkably well) but no one is afraid to use them either as I've heard some people complain about with the fancy fabric rolled towels. I think the key to my long term success here is that I have a dedicated small bathroom size trash bin in the pantry to throw the dirty towels in. I have enough towels to fill my box 2x, so one set can be in use while one set is in the laundry.


3) Swapping coconut oil for processed vegetable oils: I wasn't sure if I would be tempted down the line to have a bottle of canola or vegetable oil on hand but once we used up what we had, I haven't needed to use ANY! Between olive oil, coconut oil and butter, I'm able to meet all of my cooking needs. No spray needed either! Silicone muffin liners have been a big help in this regard. I keep about half of my coconut oil in a oil dispensing bottle (that I got at the dollar store). I take the metal pour spout off and pop it in the microwave for 30 seconds and voila! liquid oil ready for pouring!


My Favorite Recipes of 2012:

We tend to go through cycles of eating a lot of one thing in particular and then getting into something else. But there are a few favorites that I tend to enjoy over and over again!

1) Muffins: I know I've done a few posts about muffins ( Pumpkin, Zucchini) but I also have a few favorites that I haven't posted up (like Banana nut).  I make a dozen or two with what ever fruit is on hand (or in the freezer) and use whole wheat flour. After they are cooked, I keep them in the freezer so they are always ready to go. They make a great, quick breakfast for me when I'm running late and  I also send them frozen with the little guy to school.  By the time he has is morning snack break, its defrosted and ready to go!  Right now in our freezer is whole wheat cranberry muffin with a cream cheese swirl. Yum!


2) Whole Wheat Waffles: I got a new waffle maker for my birthday (thanks Bro!) and I've been making lots of waffles since then (probably 4 or 5 huge batches). I get around 20 or so waffles from my mix , so I'm able to stock up the freezer for a few weeks at a time. Both little guy and myself have been enjoying them immensely. The last 2 batches have had chocolate chips stirred in and then we use strawberry or blackberry jam on top (instead of syrup) and its soooooooo good! But I'm almost out and that means I'll be probably be doing a big batch this weekend. I'm thinking that I might have to do the next ones blueberry!


3)Whole Wheat Baking Mix: If you grew up in a certain generation, Bisquick forms the basis of a lot of quick breads, breakfasts and dinners. But when you are trying to avoid processed food, things in boxes with lots of ingredients are incompatible. I love that my version of the baking mix uses ONLY whole wheat and that it mixes up in the kitchen very quickly.


4) Spinach & Basil Pesto: Maybe its because I just ate some last night but I love this recipe! I made a giant batch months ago and I still have cups of this stuff (which costs an arm & a leg at the store) in our freezer. Last night I wasn't too energetic, so I boiled up some whole wheat pasta, sauteed a salmon fillet (cut into chunks) and tossed the whole thing with 1/2 cup of pesto, delish! The whole prep was maybe 10 minutes of work (and that was mostly skinning and deboning the salmon!)


I'd love it if you left a comment below to let me know what was YOUR favorite post of 2012!

Click the like button below to follow us on Facebook!


Monday, January 7, 2013

Real Food, Real Easy: 100% Whole Wheat Waffles

So, with the new year comes a renewed commitment (for most of us) to do better, health-wise. A simple easy start is to make sure that you are eating breakfast everyday! In our busy lives, I know it can be difficult to make good choices-- when you are short on time, do you skip a meal or pick up something in the drive through? Neither is a great option.  Knowing that I'm always pushed for time, instead of making things everyday, I make up a big batch of food on the weekend (usually Sundays). Then I freeze or refrigerate the leftovers and I've got a healthy grab and go breakfasts ready anytime!

This recipe is a great substitute for prepackaged frozen waffles. A few minutes at the waffle-maker and you'll have a week (or more!) worth of ready-to-go WHOLE WHEAT waffles. Plus the base recipe is a wonderful blank canvas for add ins. My favorite stir-in is chocolate chips but you can also up the flavor (and nutrients!) with any kind of fruit -- think blueberries, sliced bananas or strawberries. If you are in a real rush, consider topping the waffle with cream cheese or peanut butter for a less messy, eat-on-the-run meal.(plus it'll get you a nice bit of protein as well!)


Recipe: 100% Whole Wheat Waffles
makes approx. 20 waffles (if 1/4 cup batter used)

3 cups whole wheat flour (I like white whole wheat by King Arthur or Trader Joe's)
1/4 cup sugar
2 Tbs baking powder
2-2 1/4 cups whole milk
1/2 cup melted butter or coconut oil (use refined to reduce "coconut" flavor)
2 eggs, lightly beaten

Optional add-ins:
1 cup- chocolate chips OR blueberries  OR sliced bananas OR sliced strawberries


1) Combine dry ingredients in a large mixing bowl. Whisk to incorporate.
2) Add liquid ingredients and stir until well mixed-- start with 2 cups of milk. Add more until batter is pourable-- it shouldn't be either runny or pasty. Stir in optional add-ins, if including.
3) Heat up waffle iron. Butter or oil compartments as necessary.
4) Spoon or scoop approximately 1/4 cup of batter into center of each waffle compartment. If you have a smaller waffle-maker, this should fill it up. If you have a GIANT belgian waffle-maker like mine, you'll see that my waffles aren't quite filled up. This is okay because one, full-size waffle was TOO big!


5) Cook until LIGHTLY browned and set. This is probably less done than you'd want if you are eating them out of the cooker-- you are deliberately slightly undercooking to ensure that they don't get too dark when you run them through the toaster to reheat!
6) Remove waffles and set aside to cool completely.


7) Package in gallon size zip bag or other airtight container and freeze.


To Reheat: Take waffle directly from freezer to toaster. Cook on normal toast setting (with defrost, if available). Top with butter, syrup, jam, diced fruit, cream cheese, peanut butter or anything else I've missed!

We typically alternate waffles with some of the whole wheat muffins I've made (and keep in the freezer as well). I've also taken to experimenting with whole wheat bagel making. With a constantly changing flavors and types of whole wheat pre-baked breakfasts, the family doesn't get bored of one thing or option. Plus I love knowing that no matter how hurried I get, there is always something I can grab that isn't full of empty calories or tastes like cardboard!

 As always, feel free to comment below and let me know what you think of the recipe or how it worked for you!

Like us on Facebook to add us to your newsfeed.