road

road
Showing posts with label Sewing Projects. Show all posts

Sunday, August 25, 2013

Sewing Project: Foldable Lunch Sack

So after I finished the last blog entry, I was feeling all ready for school. Then, as I was setting up both boys' backpacks I had a "doh",  forehead smacking moment-- the super cute fire truck lunch box I had gotten for my preschooler didn't actually fit in his tiny preschool backpack. Oops!!  His backpack is a cute hand-me-down from brother that has Elmo and is sized just perfectly for preschool-- it will just fit his snack and his spare set of clothes. Unfortunately the full size lunch box was just too much for it!

Last year, he started part way through the school year and I never got around to getting him an "official" lunch box. Since he only takes a snack at school, we don't need anything really big, so we mostly were using a cheapy sack that I think had originally come in a Subway kids meal. I really wanted him to have something a little better this year (and something new too, since his backpack wasn't being replaced). Since the new lunch box was a bust, I decided I'd just whip something up. As I wasn't working through anyone else's tutorial or pattern, I had a bit of trial and error here but I think, in the end, it worked out pretty well!


I opted to use a Sesame themed fabric (to go with the backpack) but obviously you could pick anything here--- simple solids or fun checks, or how about the popular chevrons? The fabric stores (even in Wal-Mart) also have plenty of branded fabrics featuring other popular characters (Dora, Mickey, etc) as well as professional sports teams.  You could also go super feminine for yourself -- if I needed a lunch sack, I'd do one in a lovely floral with pink trim.


Sewing Tutorial: Foldable Lunch Sack


Materials List:

1/2 yard main body fabric (this is more than you'll need but will allow for pattern matching-- if you go for a solid, you'll only need 1/4 yard)

1/4 yard nylon (basic windbreaker type material-- any color, I used white-- this helps to increase the water/moisture resistance of the fabric and makes it possible to wipe up many spills with a damp cloth)

1/4 yard stiff, iron on (fusible) interfacing (I have a super craft weight that I love)

1 package of single fold bias tape (4yd & 1/2 in wide) in coordinating color

matching thread

5" of hook and loop tape (velcro) -- sew-in style NOT adhesive!!!

Equipment: basic sewing machine, iron


Directions:

1) From your main fabric, cut 2 pieces 7" x 11" (piece A) & 2 pieces 5"x 9" (piece B), the short sides are the top & bottom, so make sure to be aware of patterns and directionality!!  Also cut 1 piece 4 1/2 x 7 (piece C) -- the long sides are the top & bottom for that one.


2) Cut 2 pieces 7" x 11" ,  2 pieces 5" x 9" and one piece 4 1/2" x 7" out of your nylon.

3) Cut 2 pieces 7" x 11" out of interfacing.

4) Following the manufacturer's instructions, fuse your interfacing to the WRONG sides of your main body fabric (do not get your nylon anywhere near the iron or you will have a melty mess on your hands!!)

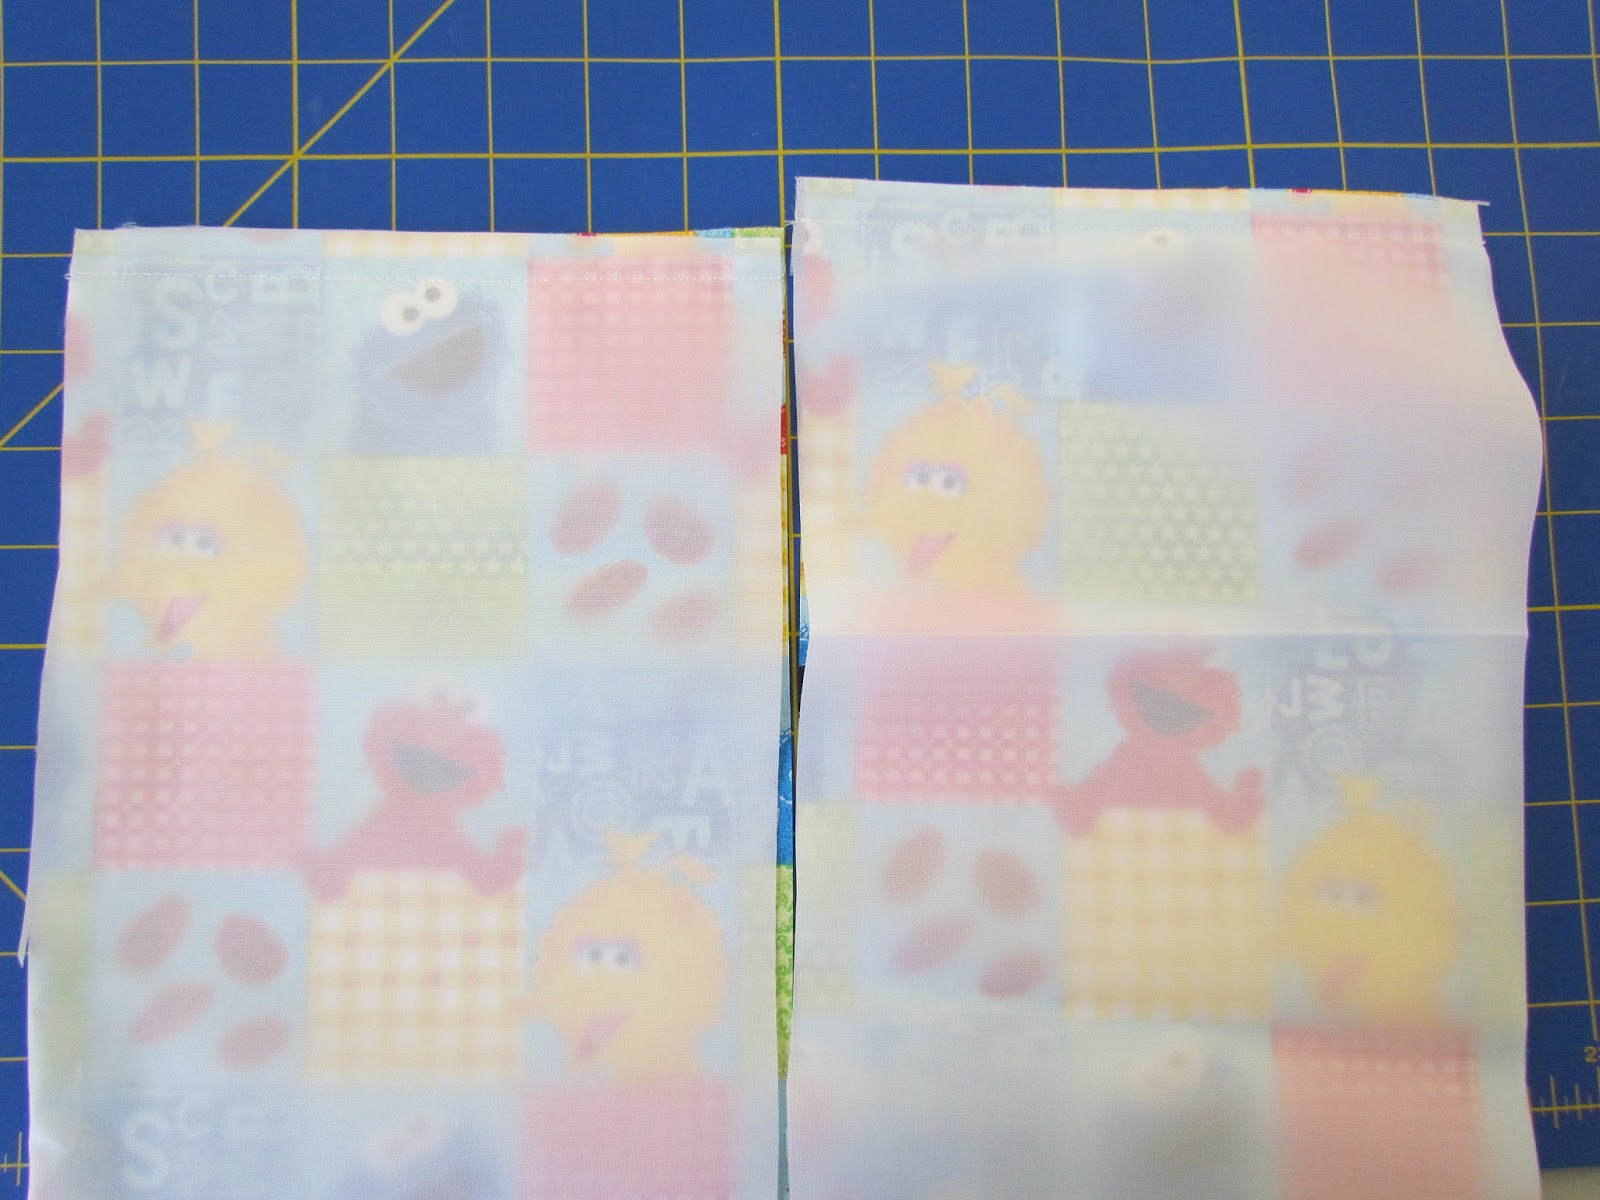
I know this shows a margin but after I finished, I found that it would be better with a full width of interfacing.

5) Line up one piece A of main fabric with its matching piece A of nylon, RIGHT sides together. Sew a seam with a 1/2" seam allowance across the TOP of the fabrics. Turn fabrics right ways out and use your fingers to press the seam. Top stitch across the top, approximately 1/4" inch from the top seam.  Repeat with 2nd set of A pieces.


I actually did the top stitching later on but it was a real pain to work around seams.
 So, even though you see pins here and elsewhere, go ahead and do the top stitching now.

6) Line up one piece B of main fabric with its matching piece B of nylon, RIGHT sides together-- repeat as above in step 5 for both pieces.

7) Take both finished piece A sets and turn so right fabrics are facing together, nylon to nylon and main fabric to main fabric. Sew a 1/2" seam for each end. This will make a kind of long tube. Turn right sides out and finger press.


8) From your bottom seam, measure out approx. 2 inches & mark with a pin on both sides. Gently crease along this line -- a ruler or straight edge of a table might help to keep it even.


9) Take one piece B set and line up the top seams with the front & back edges of your bag. Moving carefully, match up edges , with nylon meeting nylon/insides together. You may have little bits dangling at the bottom corners, don't worry about that right now! Just make sure that the fabrics are lined up as smoothly as possible, with no wrinkles or folds.


10) Stitch along this edge, using a 1/4 inch seam allowance. Go slowly and carefully and be sure to catch all layers of fabric. It will take some finessing along the bottom corners, just keep stopping and realigning as necessary. Be sure to reinforce the beginning and ending of this stitching by reversing!!


11) Repeat for other side.

12) Trim seam allowance to just under 1/4 inch.


13) We will make the top flap now-- Sew together the main fabric piece C with its matching nylon-- RIGHT sides together, both TOP and BOTTOM, using a 1/4" seam allowance. Turn fabric tube right side out and finger press both seams. Ensure that width of flap matches your bag width or is slightly wider.


14) To attach flap, line up top seam of flap with top seam of backside of bag. They will only overlap for approx. 1/4". Sew right down the middle of this overlap area to secure the flap. WATCH your patterns here --remember that the bag back and flap will be going in OPPOSITE directions. Double check before sewing or your flap will end up being upside down! Trim flap to match bag width.


Inside view of flap attachment. Trim after this.
Inside view of sack-- note all seams are finished!

15) Measure and cut enough bias tape to go from front edge of lunch sack around the bottom and up the back to the end of the flap TWICE + 2 " (approx. 24").  Cut in half.  Open the folds of one end on each piece. Keeping right sides together, line up tape (right side toward right side of fabric) with raw edge of side seam. Start at front edge of sack and go all the way to the end of the flap. Do this for both sides, making a sandwich.


16) Stitch along small fold closest to seam. Be sure to catch all the layers of the fabric!

17) At front edge of lunch sack, sew a small seam across cut edges of bias tape as close as possible to sack WITHOUT touching the sack. Trim to 1/4" inch.


18) Return bias tape to its natural fold. This should make an enclosure for the raw seam on the side of your sack. Pin together.

19) Repeat steps 15-18 for the other side.

20) Measure and cut enough bias tape to go around entire lower flap edge + 2" (approx. 16"). Open bias tape and sew a seam (right sides together) to make a loop that is the EXACT width of your flap. Trim seam to 1/4 inch. Place the unfolded loop with right sides in over the flap edge. Sew along small fold closest to edge. Be sure to reinforce beginning and ending stitches.
Forgot to take a picture, sorry! This is how to line up the new piece of bias tape (in grey, transparent here to see the bottom layers) in relation to the ends of the previous pieces. Stitch along black line. 

21) Return bias tape to its natural fold. This should enclose edge of flap + cut ends of bias tape from sides.

22) Top stitch 1/8" from edge around the entire sack to close up bias tape.


23) Close lunch sack and determine placement for hook and loop enclosure. Cut approx. 2 inches (or personal preference!) . Sew hook side onto flap and loop side onto sack. Pin and double check alignment before stitching! You can either sew a straight line 1/8" inside edge of tape OR zigzag the edges.


24) Open flap, fold bottom of lunch sack towards flap, fold over again. Mark placement of second piece of LOOP ONLY on new location (if you want it to be secured in the folded position!). Attach new piece of loop.


You are done! Marvel at your handiwork!

This should be completely washable but the more you run it through the machine, the softer the interfacing will become. Also, I wouldn't recommend drying it in the dryer as the nylon could be sensitive to excess heat! For the most part, the nylon should make it easy to wipe up/sponge off any spills. If you really need it to be fully washable/dryable, consider subbing in a cotton canvas material for the nylon. It will also provide a decent moisture barrier but isn't temperature fussy!

As an aside, this project cost me a sum total of $3.50!!  I bought the Sesame fabric for $2.50 (10 a yard @ .5 yards and a 50% off coupon at JoAnns and the bias tape for $1.99 and a 50% off coupon at JoAnns . The nylon and interfacing were leftovers from a previous project. If you are buying new, this will add about $2 to your total-- so expect to spend between $5-10 depending on coupon use, sales, etc.

As always, feel free to ask questions or comment on the project! If you like what you see, "like" us to add us to your Facebook feed!



Wednesday, July 10, 2013

Super Simple DIY Cloth Napkins

Well after nearly 2 weeks of (almost constant) knitting on vacation, I'm glad to be back to sewing. I do enjoy the knitting but I still haven't quite figured out how to do it for any length of time without getting my shoulders all tensed up. Besides, I have all sorts of fabric just sitting there, ready to go. I know I've got more projects than I honestly can do in the next few months so let's get going, shall we?

This time last year I walked you through an easy (and inexpensive) way of getting rid of paper towels. I'm happy to say that we've stuck with it and didn't buy any paper towel until we needed some for camping this summer!

I think the key to success (for me) has been having a system in place designed to make it convenient-- because let's be honest here-- things that are difficult or a pain rarely get maintained! So my program includes having the container of towels right on the countertop-- no need to even open a drawer. They are as easy to access as a paper towel would be (and perhaps even easier since you don't have to rip it off the roll). Secondly, I have a small bathroom size wastebasket (serving as a laundry basket) RIGHT NEXT TO the trash can. So its in exactly the same spot I'd throw a paper towel away. How easy is that? Lastly, I have enough towels to have a full box, plus a complete refill. That way there are always towels available.

This year, I'm going to help you get set up with cloth napkins. I think the key to making cloth napkins convenient is actually the design. Some of the annoying things I've found in the past with the cloth napkins I had was that they were WAY too big, needed ironing if I just looked at them AND rarely looked truly clean after the first use. So, around the end of last year, I spent a bit of time fooling around with some size & sewing ideas until I had a napkin that was a good, useful size but not overly large (who really needs a 18" square napkin for a Wednesday night dinner?) and used a durable (and clean-able) fabric. I also wanted something that wasn't a pain to sew and would absolutely NOT require ironing!

What I ended up with are 2 ply napkins, sewn from quilting cotton fabrics. These are readily available for a very reasonable price, come in cute patterns to suit any décor or holiday theme and are designed specifically to be washed and used over and over again. The finished size of the napkins are approximately 8" square. This is about the size of your standard paper napkin.

I have had a LOT of fun making these. I've been using them at home as well as giving them to friends and family to be tested out in the real world. In fact, there is a certain friend out there that if I don't stop sending napkins to her, she's gonna have one for each day of the year! I've even started making some to sell in my Etsy shop!

That being said, I'll walk you through the process:

Materials:
*1/4 yard of 100% cotton fabric for every 2 napkins-- so if you want 4 napkins, you'll need 1/2 yard total. This can be cut off a bolt of fabric or fat quarters. I've really enjoyed using fat quarter packs to make coordinating (but not matching) napkin sets for a fun casual look. You can also do one fabric on the front and something completely different on the back.
*cutting tools: fabric scissors or rotary cutter/mat
*ruler or cutting guide
*thread-- ideally matching or coordinating with your fabric
* sewing machine -- any old guy will do-- probably even one of those handheld "as seen on tv" guys could probably do the job!
*iron

Directions:
1) Iron all creases & wrinkles out of fabric. I know it seems premature but it really makes cutting and sewing easier without all those creases-- especially in those heavily folded fat quarter packs!

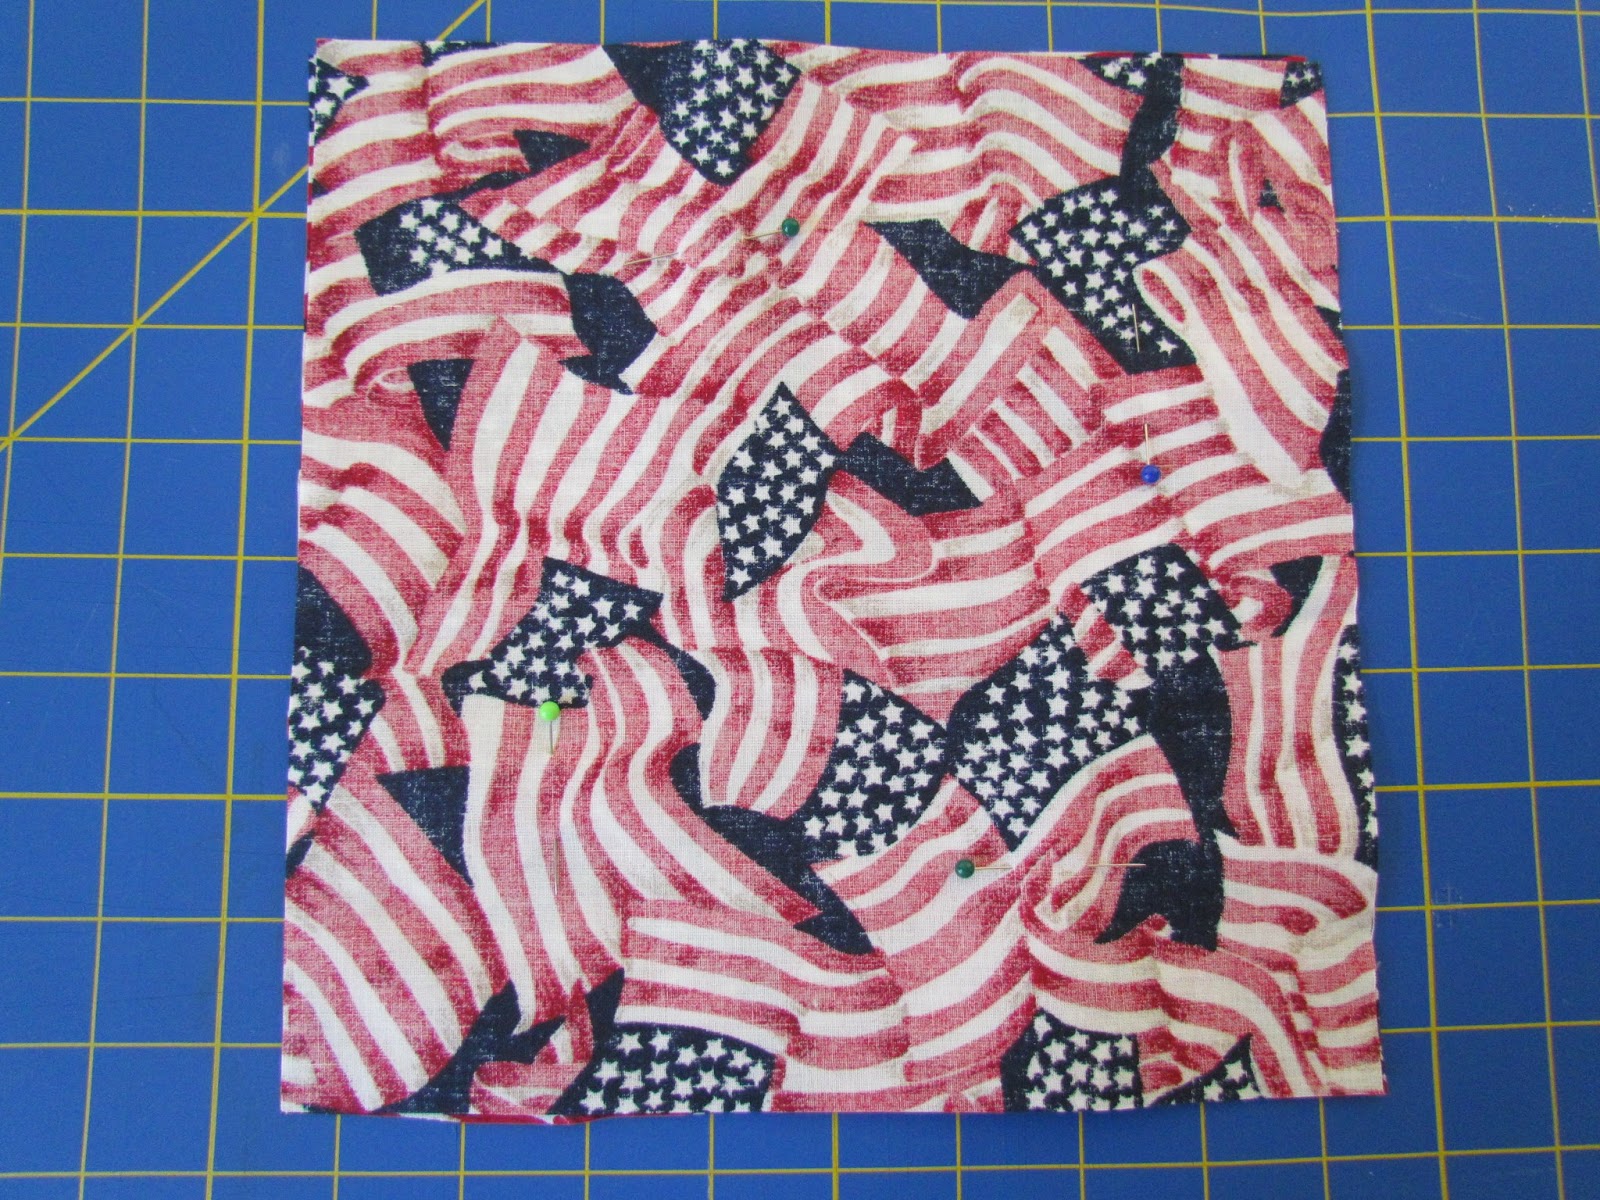
2) Measure and cut 9" x 9" squares-- remember measure twice, cut once! In cut goods, this will be 4 squares end to end. In fat quarters, its 2 across and 2 up. Cut 2 squares for EACH napkin! (4 napkins will require 8 squares)

3) Match 2 squares with right sides together. Pin if you want.

4) Sew around outside with an approximately 3/8" seam allowance. Be sure to leave a 2" opening to turn!! I highly recommend back stitching at the beginning and end of this sewing step so when you are turning, your stitches don't come loose with all the tugging and pulling!


5) Snip corners very close to stitching line (so corners will be square after turning).

6) Turn square right side out.


7) Press with iron. Be careful to align front and back. Also make sure square is fully turned out.

8) Sew 1/4" top stitch around entire edge of napkin. This will close your turning hole and make a nice finished appearance! And, it all but eliminates the need for pressing!!


9) Repeat for remaining napkins.


I've found that these will fit folded in half in most napkin holders. Just use as you would a regular paper napkin. If you happen to get them particularly gunky, just rinse it off before putting it in the laundry-- this worked wonders with spaghetti night and the 6 year old who just won't use a fork.

Napkin Fun:


If you have any questions or comments, feel free to ask below!

Click "like" to follow us on Facebook!


Monday, June 3, 2013

A Quick Fix for Cheap Pants!

Okay, so after I finished that quilt project I was totally on a high. I admit I've been doing a lot of crafts lately-- sewing mostly but I've been branching out into knitting and of course creative baking/cooking. Most of the time things come out okay. Maybe not amazing but serviceable or edible but nothing special (certainly not worth blogging about....). The quilt project was notable for several reasons but chiefly because a) it turned out the way I planned   b) I didn't have to go back to the craft store for additional supplies  c) I didn't have to rip out any seams or stitches.

In general, I think I've more successes than failures but there are still plenty of flops, for sure. I've bins of fabric, patterns and a half knitted pillow currently mocking me. Not to mention the 5 pints of strawberry "topping" I made and canned 3 weeks ago that was supposed to be jam. So when all the stars align (and the fabrics, too) I rejoice and do the happy craft dance!

That being said, I was excited to get started on the next project. However, I really felt like I needed to get some of my backlogged utility sewing out of the way before I could "play". Our littlest one is still in his crib and is a thrasher/kicker so we zip him into a sleep sack instead of blankets most nights. His fleece sleepsack (already a hand-me-down from brother) has gotten a lot of extended use. The zipper on that thing actually wore out. Rather than buy a whole new sleep sack, I spent $2.29 at Wal-Mart for a replacement zipper and spent a day ripping out the old one and sewing in the new.

The other utility sewing project I had put aside was a pile of pants. If you are like me, you have found that the cheapest pants & shorts out there are all elastic waisted. This may not be a problem for you but I have two boys with very narrow waists. One is just a skinny twig, the other is small with no noticeable butt what-so-ever. I have actually had both boys run and/or crawl out of pants that have just slipped past their tiny backsides. At home its merely annoying but at school or out in public this could be a bit embarrassing. I have actually seen my older boy try to run across the school play-yard while holding his pants up with one hand. Its just not a good thing!

Here is my quick fix solution. You should have a "tailored" pair of pants in 10-20 minutes (depending on your sewing savvy). In addition to fixing kids' pants, this will work on any elastic waist pants.


Before (pants A)
After (pants A)

Before (pants B)
After (pants B)


Materials:
Elastic (I like 3/8"), estimate 12" per pant/short
needle
thread
2 or 3 safety pins
sewing scissors


How-to:
1) Looking only at the inside waistband of your pants, determine the sewing pattern used. Usually its either a top line of stitches and bottom line of stitches with the elastic in between or sometimes there is a third line of stitches down the middle as well. You can use this method with both but its a bigger hassle with the 3 stitch type and you might need to use 2 smaller elastics instead of one larger. In my examples, you can see the tan pants have two lines of stitches and the grey ones have 3. In the grey ones, I actually only used the top channel and decided that one piece of elastic was enough for me.

2) Carefully cut between (not through) the top line of stitches and the bottom line of stitches on the far left side and far right side ONLY on the inside fabric of the pants.


3) Attach one safety pin to end of elastic. Starting at one end (doesn't matter which) thread elastic down center channel until it exits out the opposite hole. BE SURE NOT TO LET END OF ELASTIC GET LOST INSIDE WAISTBAND!! I recommend NOT pre-cutting the elastic so you'll have extra slack to hang out the hole. If you do have a short piece, when it seems like its getting near the end, pin the end to the opening with one of your extra safety pins. Sometimes they have sewn the middle of the waistband down and you can't pass your safety pin all the way across. In this case, cut an additional hole near the center of the waistband and follow the remaining instructions. Then REPEAT for the other half of the back waistband. (That's what I had to do for the grey pants)


4) Using your needle and thread, carefully sew the safety pinned elastic end to the pants. Don't sew too near the end or the elastic can sometimes unravel. If you sew similarly to attaching a button, you'll be in good shape.

5) Gently but firmly tug the unattached end of the elastic until the back of the pants has tightened to your desired tautness. In my situation, this pretty much meant I was taking up all of the slack and stretching the elastic to about 80% capacity. You don't really want to get to 100% because the constant strain on the elastic will cause it to snap or wear out more quickly, and you'll just have to do the whole project over again.


6. Use one of your safety pins to attach the tightened elastic to the pants. Sew down this end as you did for the first one. Cut off any excess elastic. Check fit of pants at this point.


7) If you are satisfied, close up the holes you cut in the pants. It doesn't really matter what the stitching looks like since this is the inside of the waistband that no one will likely ever see. If it really bothers you, you can always use an invisible stitch or use a sewing machine to embroider over the whole mess.


And now that I've finished my chores, I'm off to work on something a little bit more interesting!! I've got the sewing bug right now, so expect a few more fabric based projects (at least until my attention wanders... again!)


As always, feel free to comment or leave a question below. If you like what you see, click the "like" button to add us to your Facebook newsfeed!